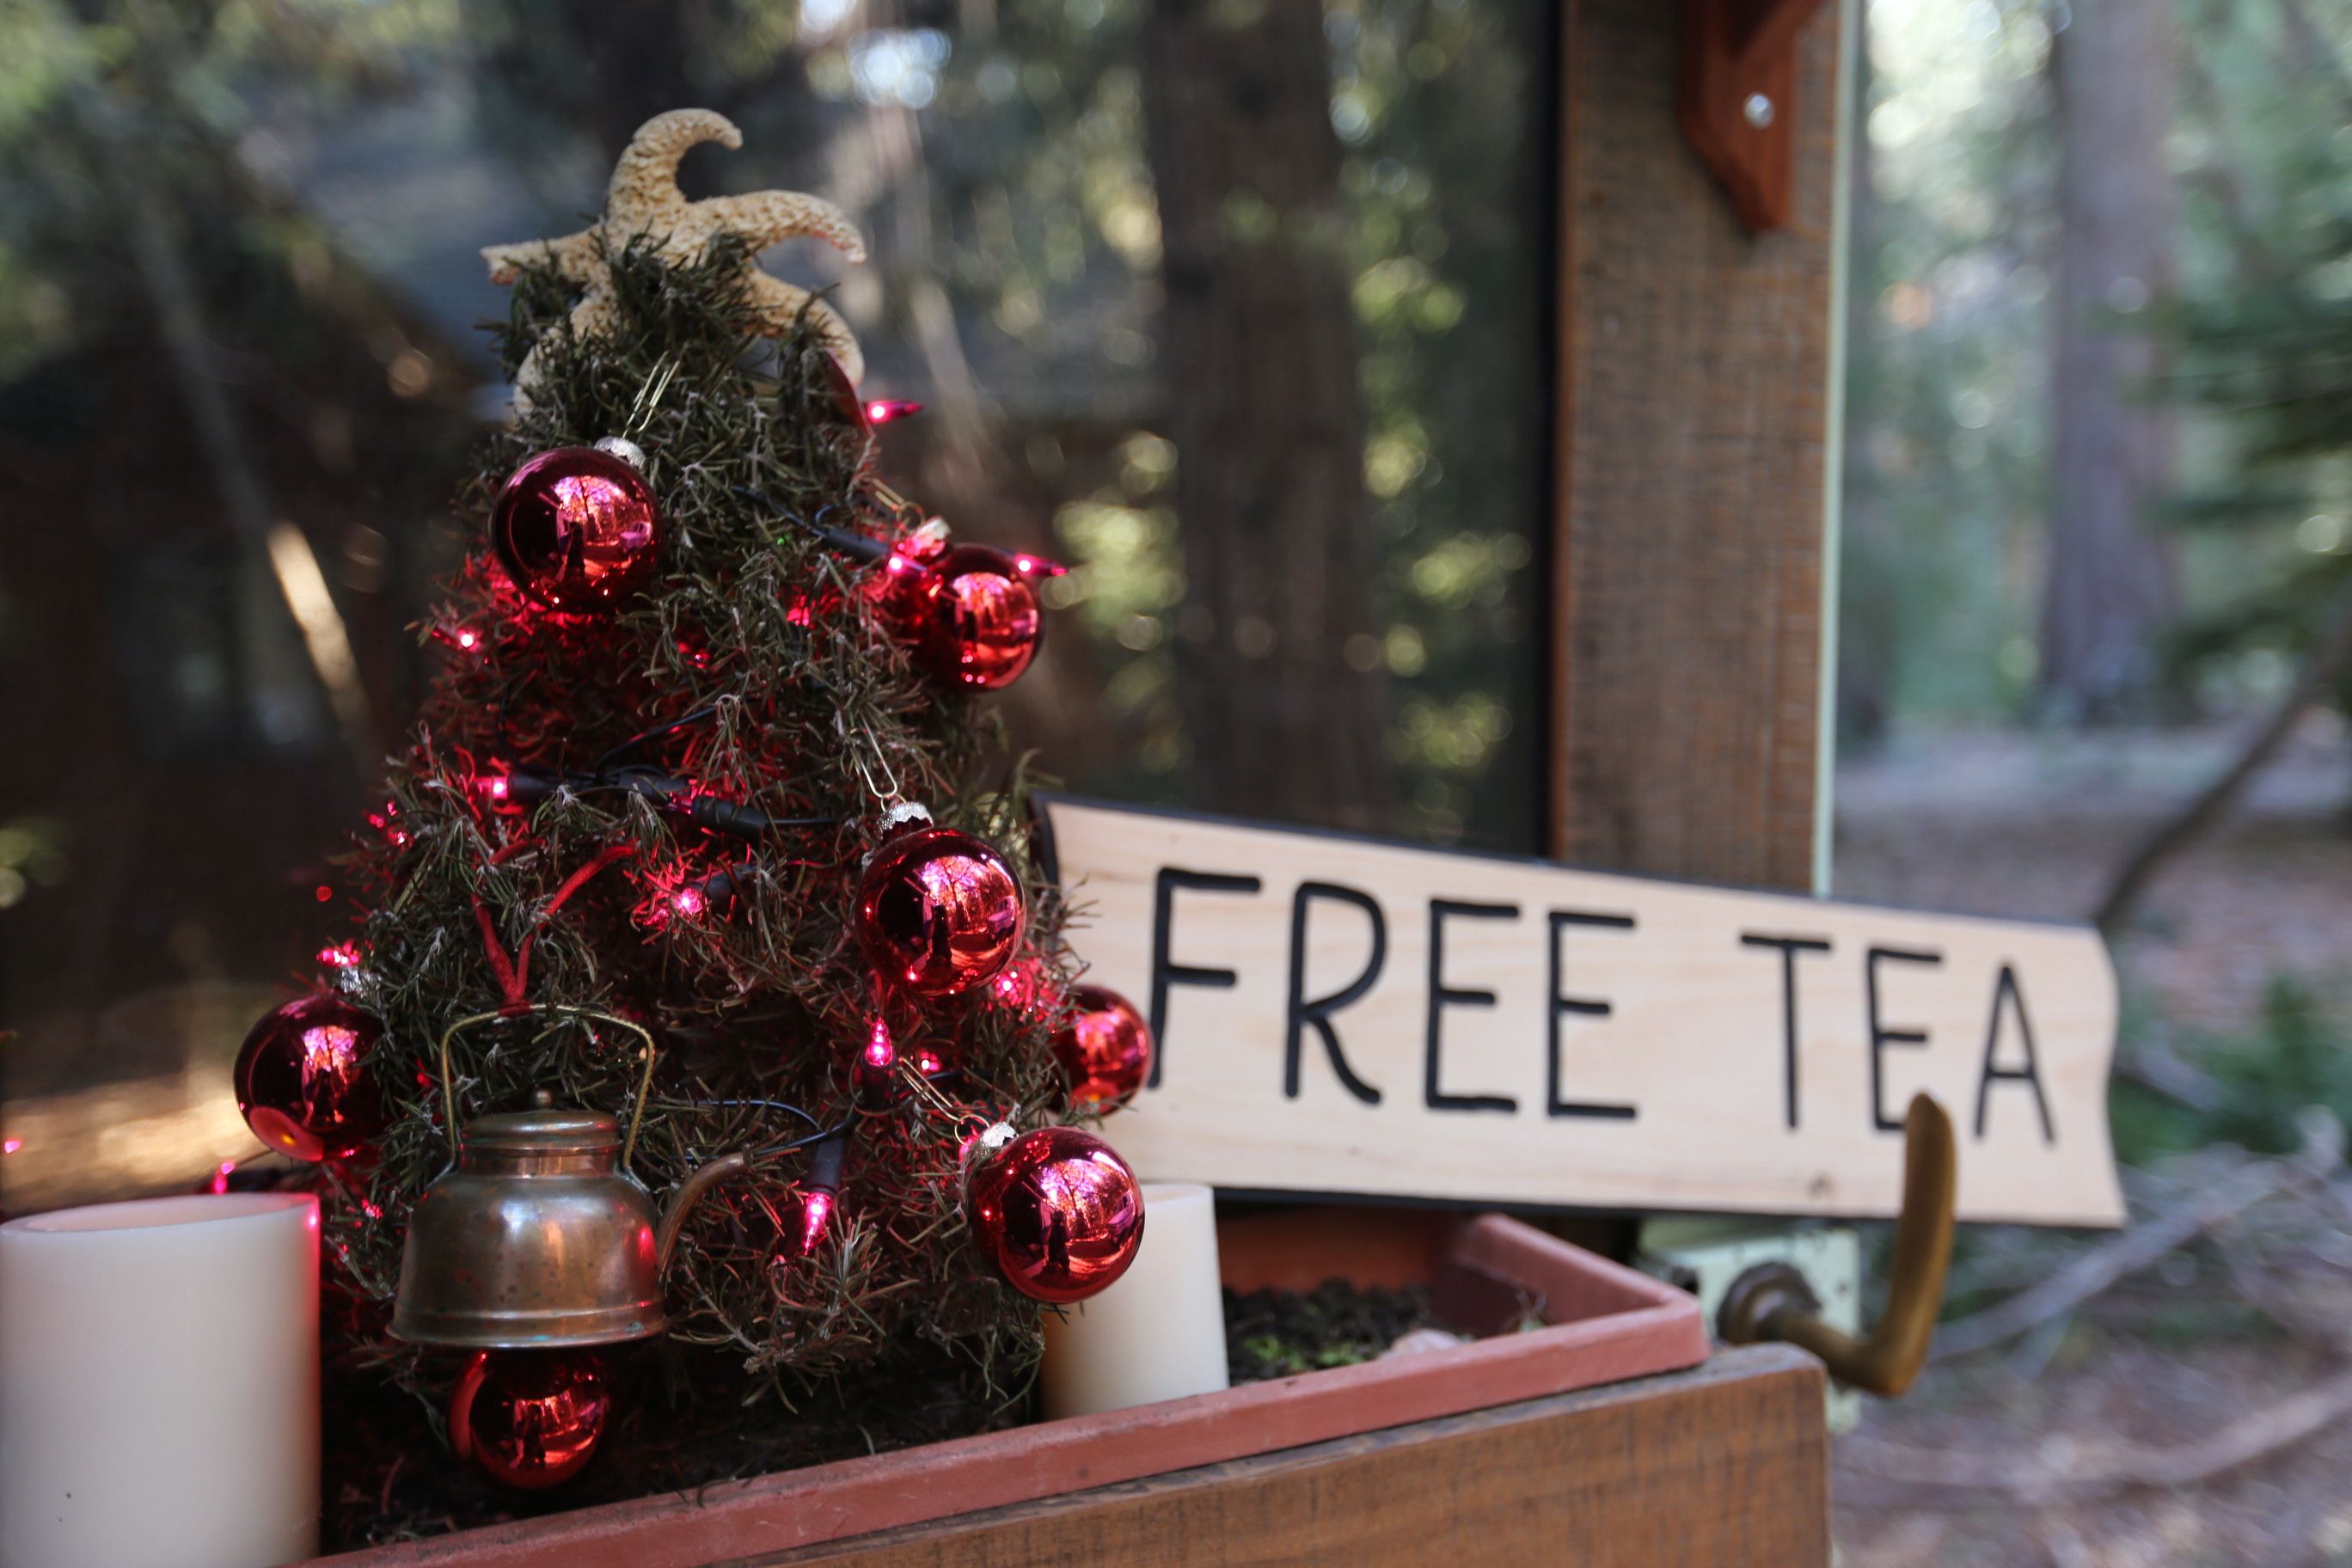
Merry Xmas! Free Tea sign was a gift from Noah and Ashley. Copper Tea kettle ornament was a gift from Jennifer. Xmas tree shaped Rosemary bush was a gift from Whitney. Ornaments, lights, and candles were from a dumpster
Well, it seems as if the craziness of Spring and Summer caught up with us, and our focus over the course of fall has shifted from outward craziness (serving tea, events, traveling) to more inward craziness (many, many bus projects). We arrived in Portland in early October on my birthday, where we’ve been for the most part (except this crazy weekend in Eugene). Edna and I have been staying with our dear friends Owen and Whitney, where we have been hosted with grace. There’s an amazing shop space here, as well as plenty of space to park Edna, and other nomads who bring their rigs in, such as Ally and her tea van, and Sarah, Waka, Tahi, and their Acro Yoga RV. It was a beautiful sight to walk out the back door of the house to see the mist of autumn creep in with a couple vans and buses in the yard with a campfire pit in the center, and a wood-fired hot tub between it all.
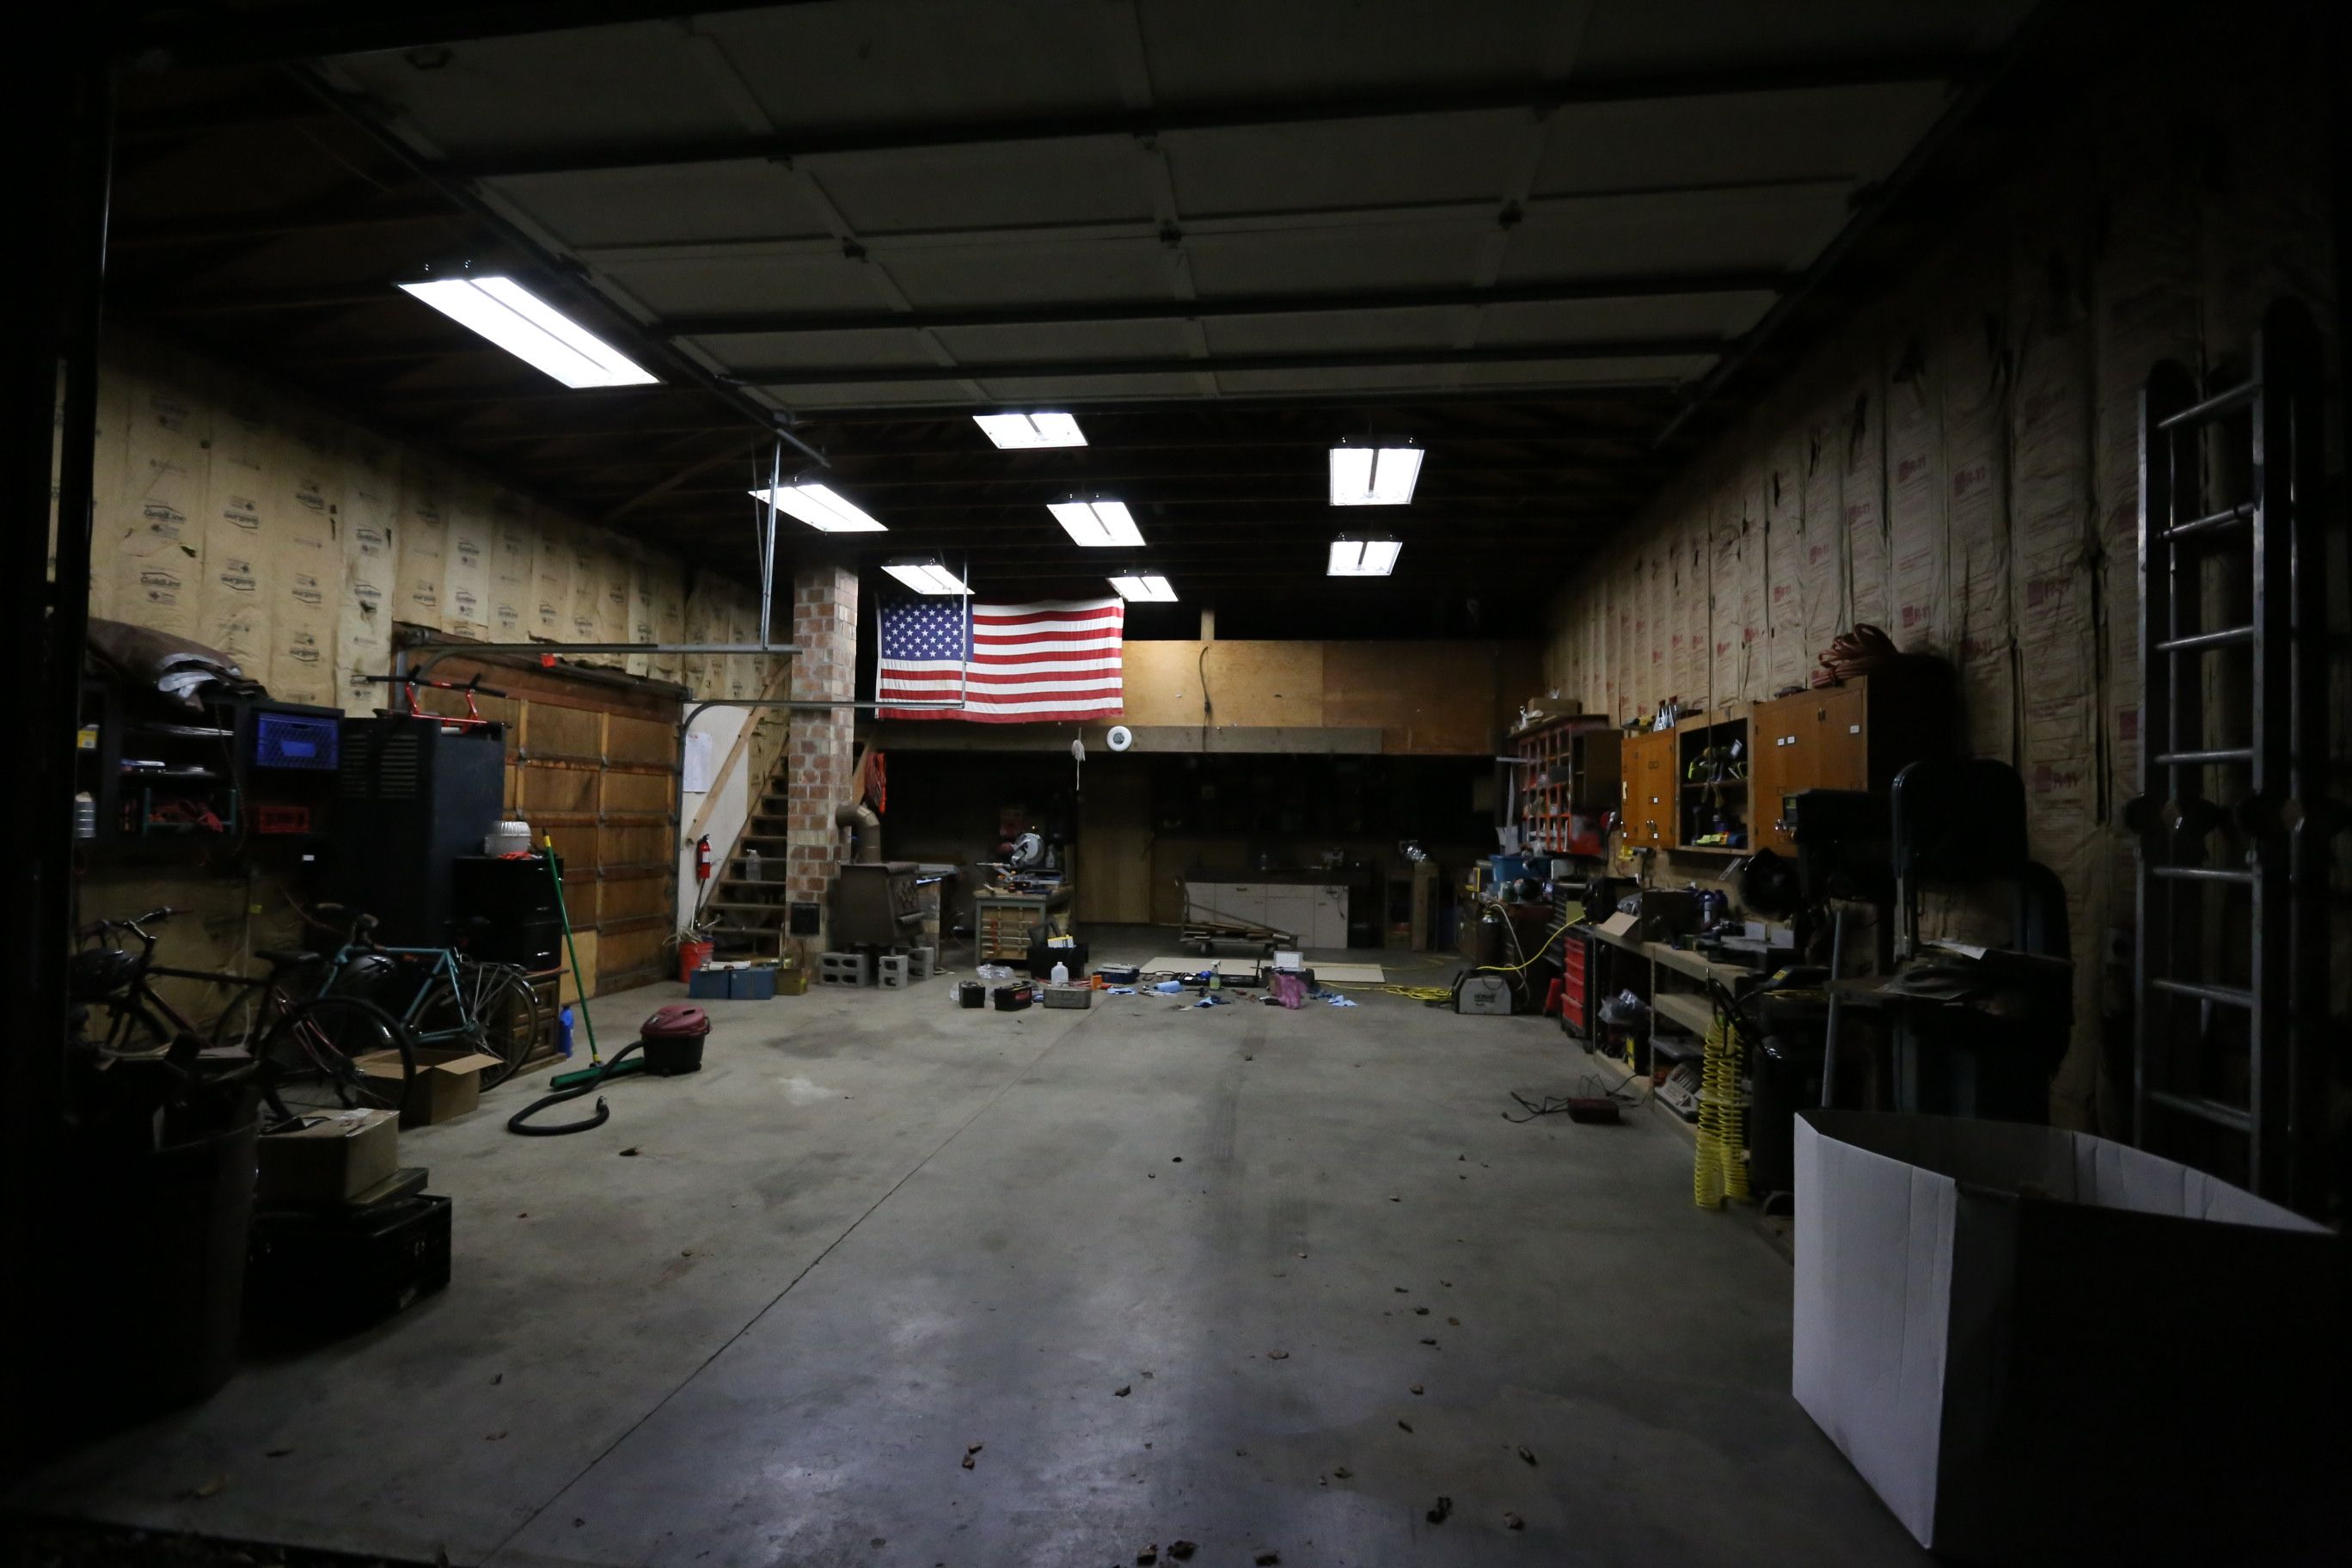
Owen’s Shop
Ally’s van was another project that we worked on a bit, from draining and refilling the rear differential, changing the oil, and bleeding the brakes, to installing a rod to keep her belongings from sliding across the floor when she brakes, putting in some hooks, and finding prized parts at the junkyard for fixing her wing windows. It was fun to share knowledge about hands on things and then let her run with it and fix/build things herself.
I also helped out my buddy Owen by helping organize some of his shop (including most of the nuts/bolts/hardware), and we built two awesome 4’x8’ work benches on casters.
 To break up all the projects, Edna and I got out a little bit into the city to make tea for people. We served a bunch of tea up at an Elephant Revival show at the Aladdin Theater, as well as a Shook Twins show at the Alberta Rose Theater. On Halloween, we setup on Alberta St. for an unofficial Last Thursday Art Walk where we had crazy medicine man, ninjas, a police officer playing guitar (not sure if it was a costume or not), an inmate doing a strip tease, and myself and Ally as the King and Queen of Junk. There were jam sessions and my buddy William showed up with his WonderVan, which is a nicely built out minimalist space on wheels. Another fellow who I pointed in the direction of a sweet diesel van for sale during the VBC came by with that van that he had recently moved into. We geeked out on some things and I shared some crucial info.

King and Queen of Junk

Inmate does a strip-tease.

Halloween Jam Session

Medicine man

Hey, everyone needs tea.
I bought a nice little folding bike on Craig’s List that needed some work, so I brought Edna a couple times to a place called Bike Farm and shared tea and some of Ally’s baked goods with all the folks there. Bike Farm is an awesome project. Several days per week they are open to the public and have volunteers there to help you learn how to fix your bike. There’s tools, bike stands, cheap/used bike parts, etc. I love this place! I put new tires on, put on new brake pads, trued my rims, repacked my wheel bearings, etc. I love learning new things like this. Mad respect to Bike Farm.

Tea at Reed College. Photo: Chris Ellis
Edna and I were also invited back by Reed College to come serve tea. If you remember, we arrived on campus without permission during finals week in the Spring and served up a gang of tea. They liked us so much that they invited us back. We spent 15 hours there and made over 300 cups of tea. It was a long day filled with students, faculty, facilities staff, alums, and to top it off, there was a “noise parade” that demonstrated against Reeds investment in fossil fuels. I truly love serving tea to college students, especially brainy ones like Reed students, who intellectually get what I do and love it. Thanks to Gary (Community Safety) for not kicking us off campus the first time around, and telling Student Activities to have us back. Thanks to Daphne for arranging it all. Thanks to Ryn for buying us milk in the dining hall so we could make tons of chai. Thanks to the students who donated teas both times we were there. Thanks to Rebecca for writing a sweet little article for The Reed Quest (Reed it here).

Serving at Reed College. Photo: Chris Ellis
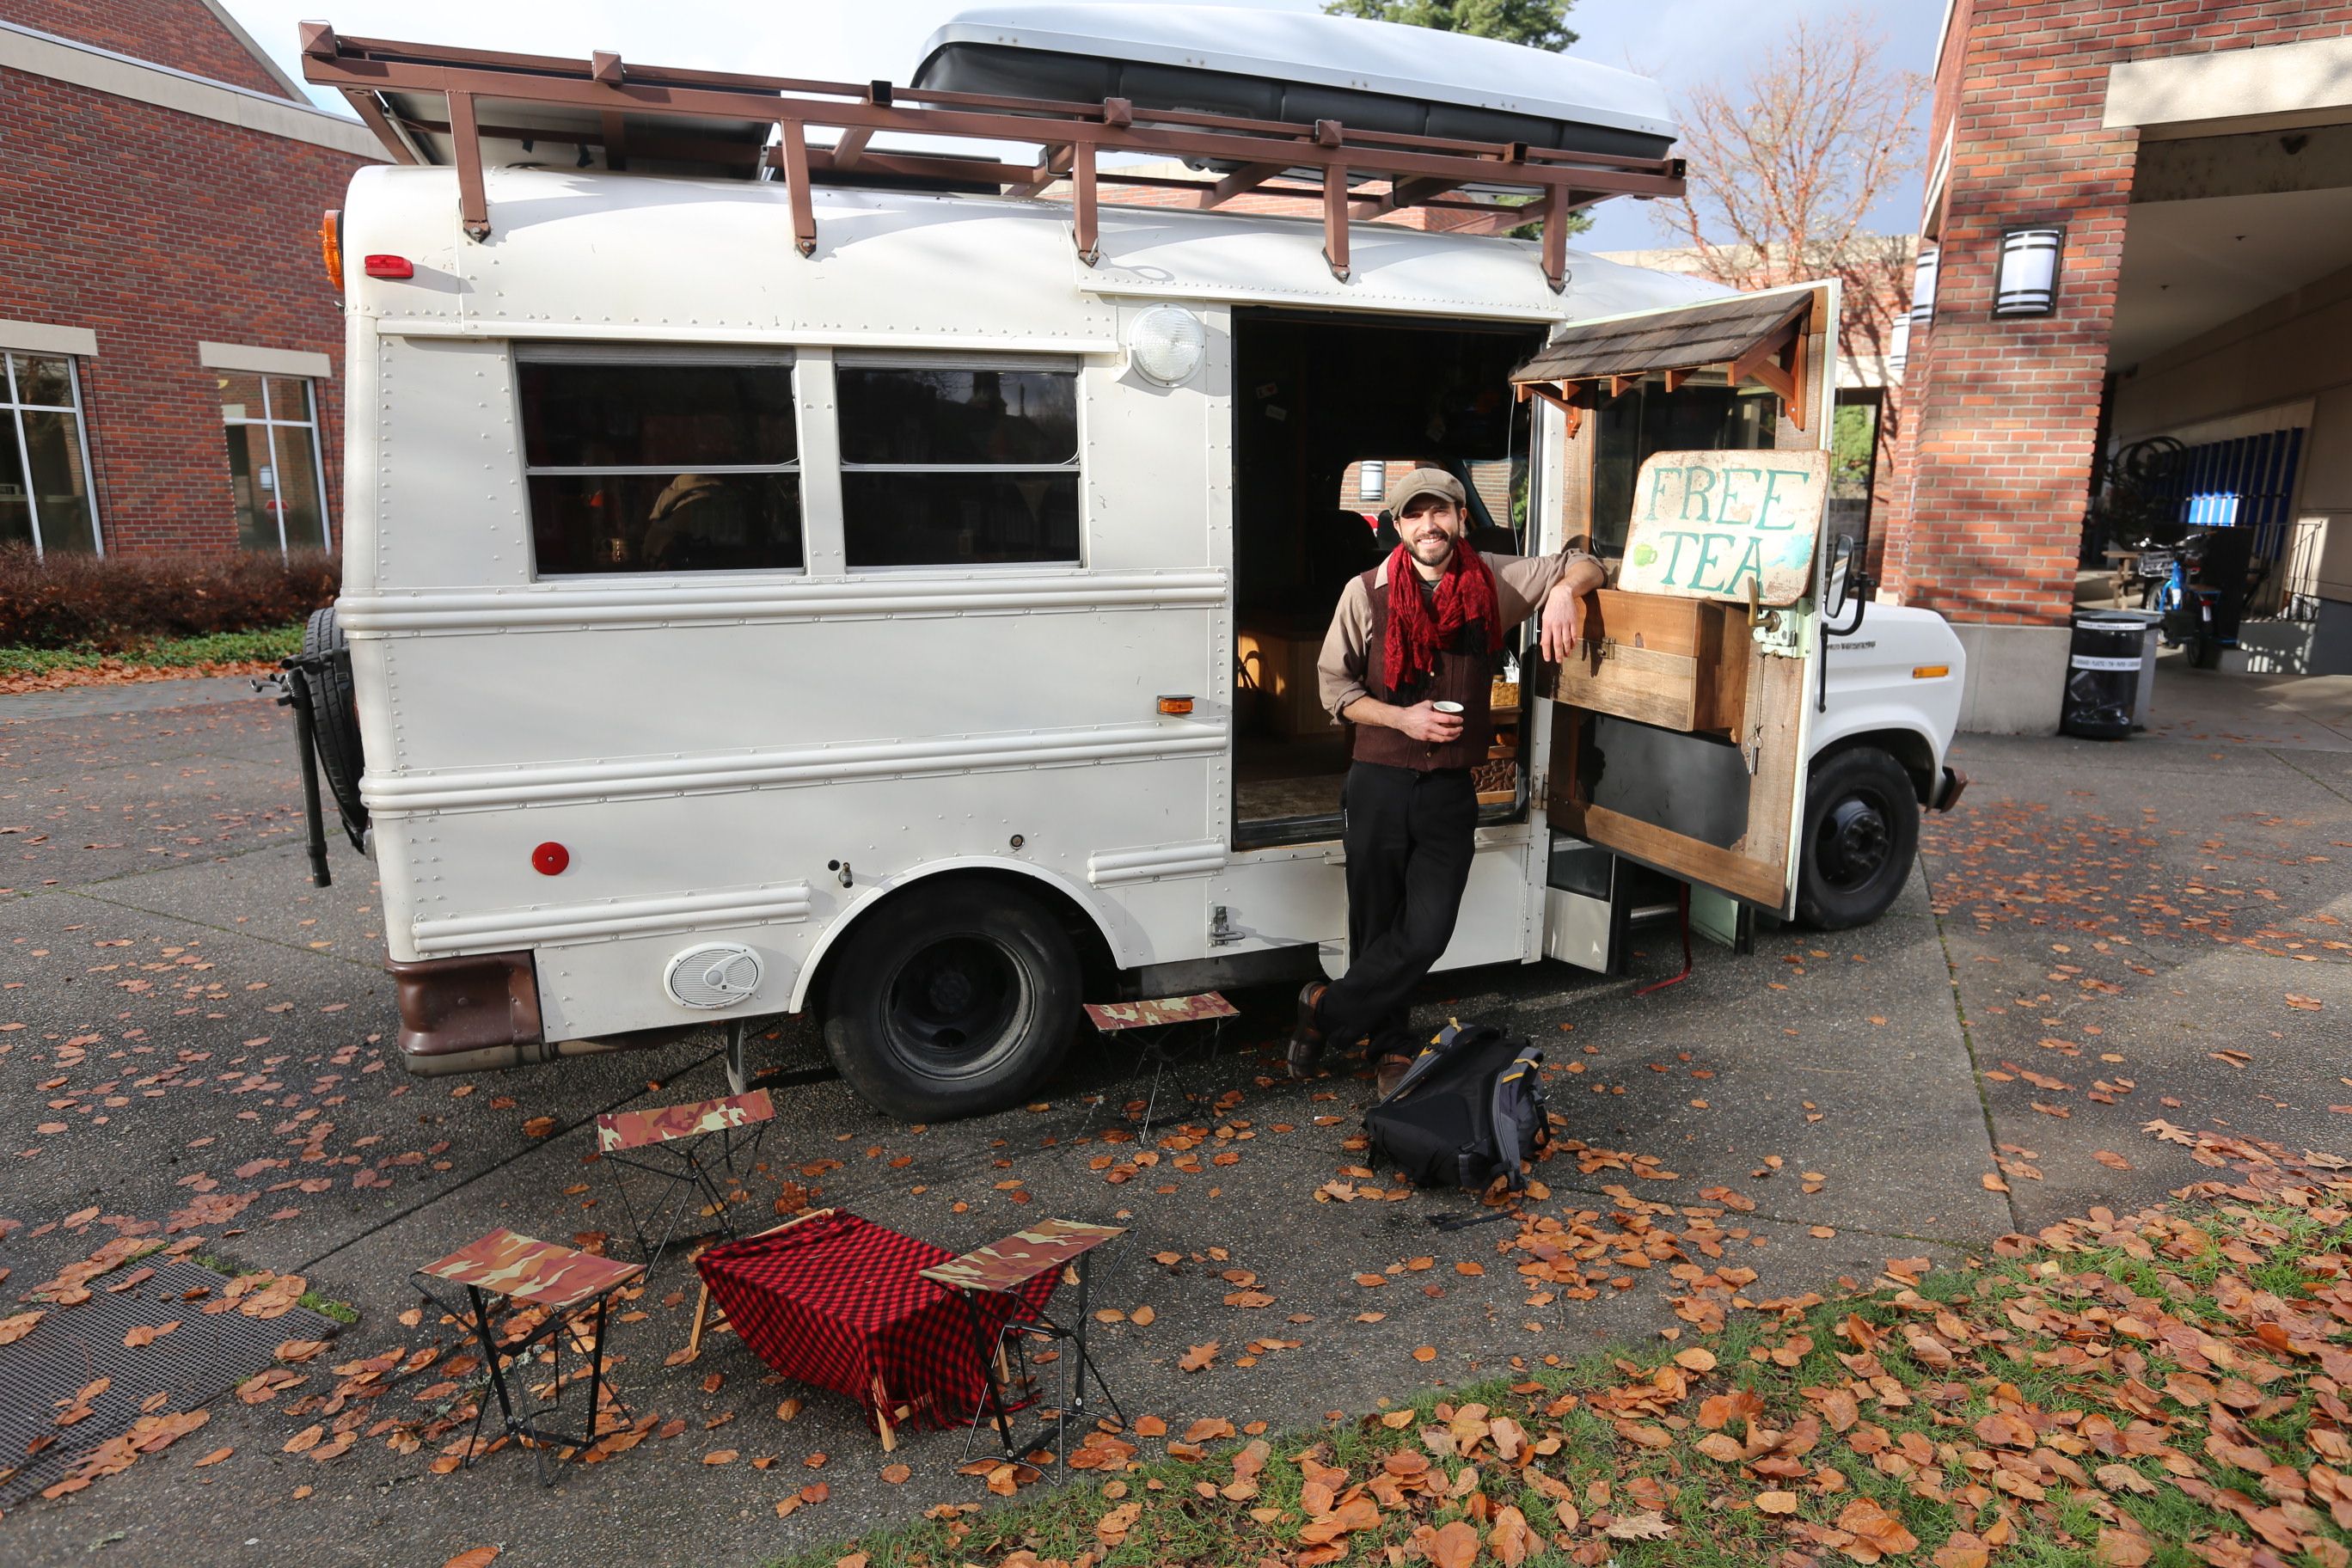
Photo for the Reed Quest. Photo: Chris Ellis

A lull at Reed
Some of the bus projects:
INSIDE:

Fold-down desk.
– Fold-down desk/curved shelf. This was a big one. I had been wanting to fill the one void in the bus with this fold down desk idea that had been brewing in my head for a while. It was a fun project, but took a while. The desk is essentially a cabinet with a fold-down front that becomes the desk. To support the desk, there’s an old brass adjustable window bracket, which can be adjusted depending on what angle the bus is parked on. Inside the cabinet there’s several shelves, each of which has a sweet little wooden box that slides easily in and out. Each box has a purpose (misc tools, electronic gear, desk/craft stuff, fun stuff). To latch the desk shut, you just lightly slam it into place and a cool brass catch keeps it up. On the side of the desk are both a 110v outlet and a 12v outlet. This allows me to run my computer and hard drives for video editing and other computer work. On the top of the desk is a curved shelf that goes from the side of an upper cabinet to the wall. The front piece is eight separate 1/8” thick pieces of redwood that I glued together one at a time while clamped to a piece of ¾” plywood shaped in the curve I wanted. This was the longest part of the desk project, as I waited at least 24 hours between every glue up. In the end the curve wasn’t quite as arced as I wanted, but it was so close that it ended up working great.

Cardboard mockup of curved shelf.

Empty space for the desk.

Desk cabinet being worked out.

Fold-down desk.

Plywood jig for the curved shelf.
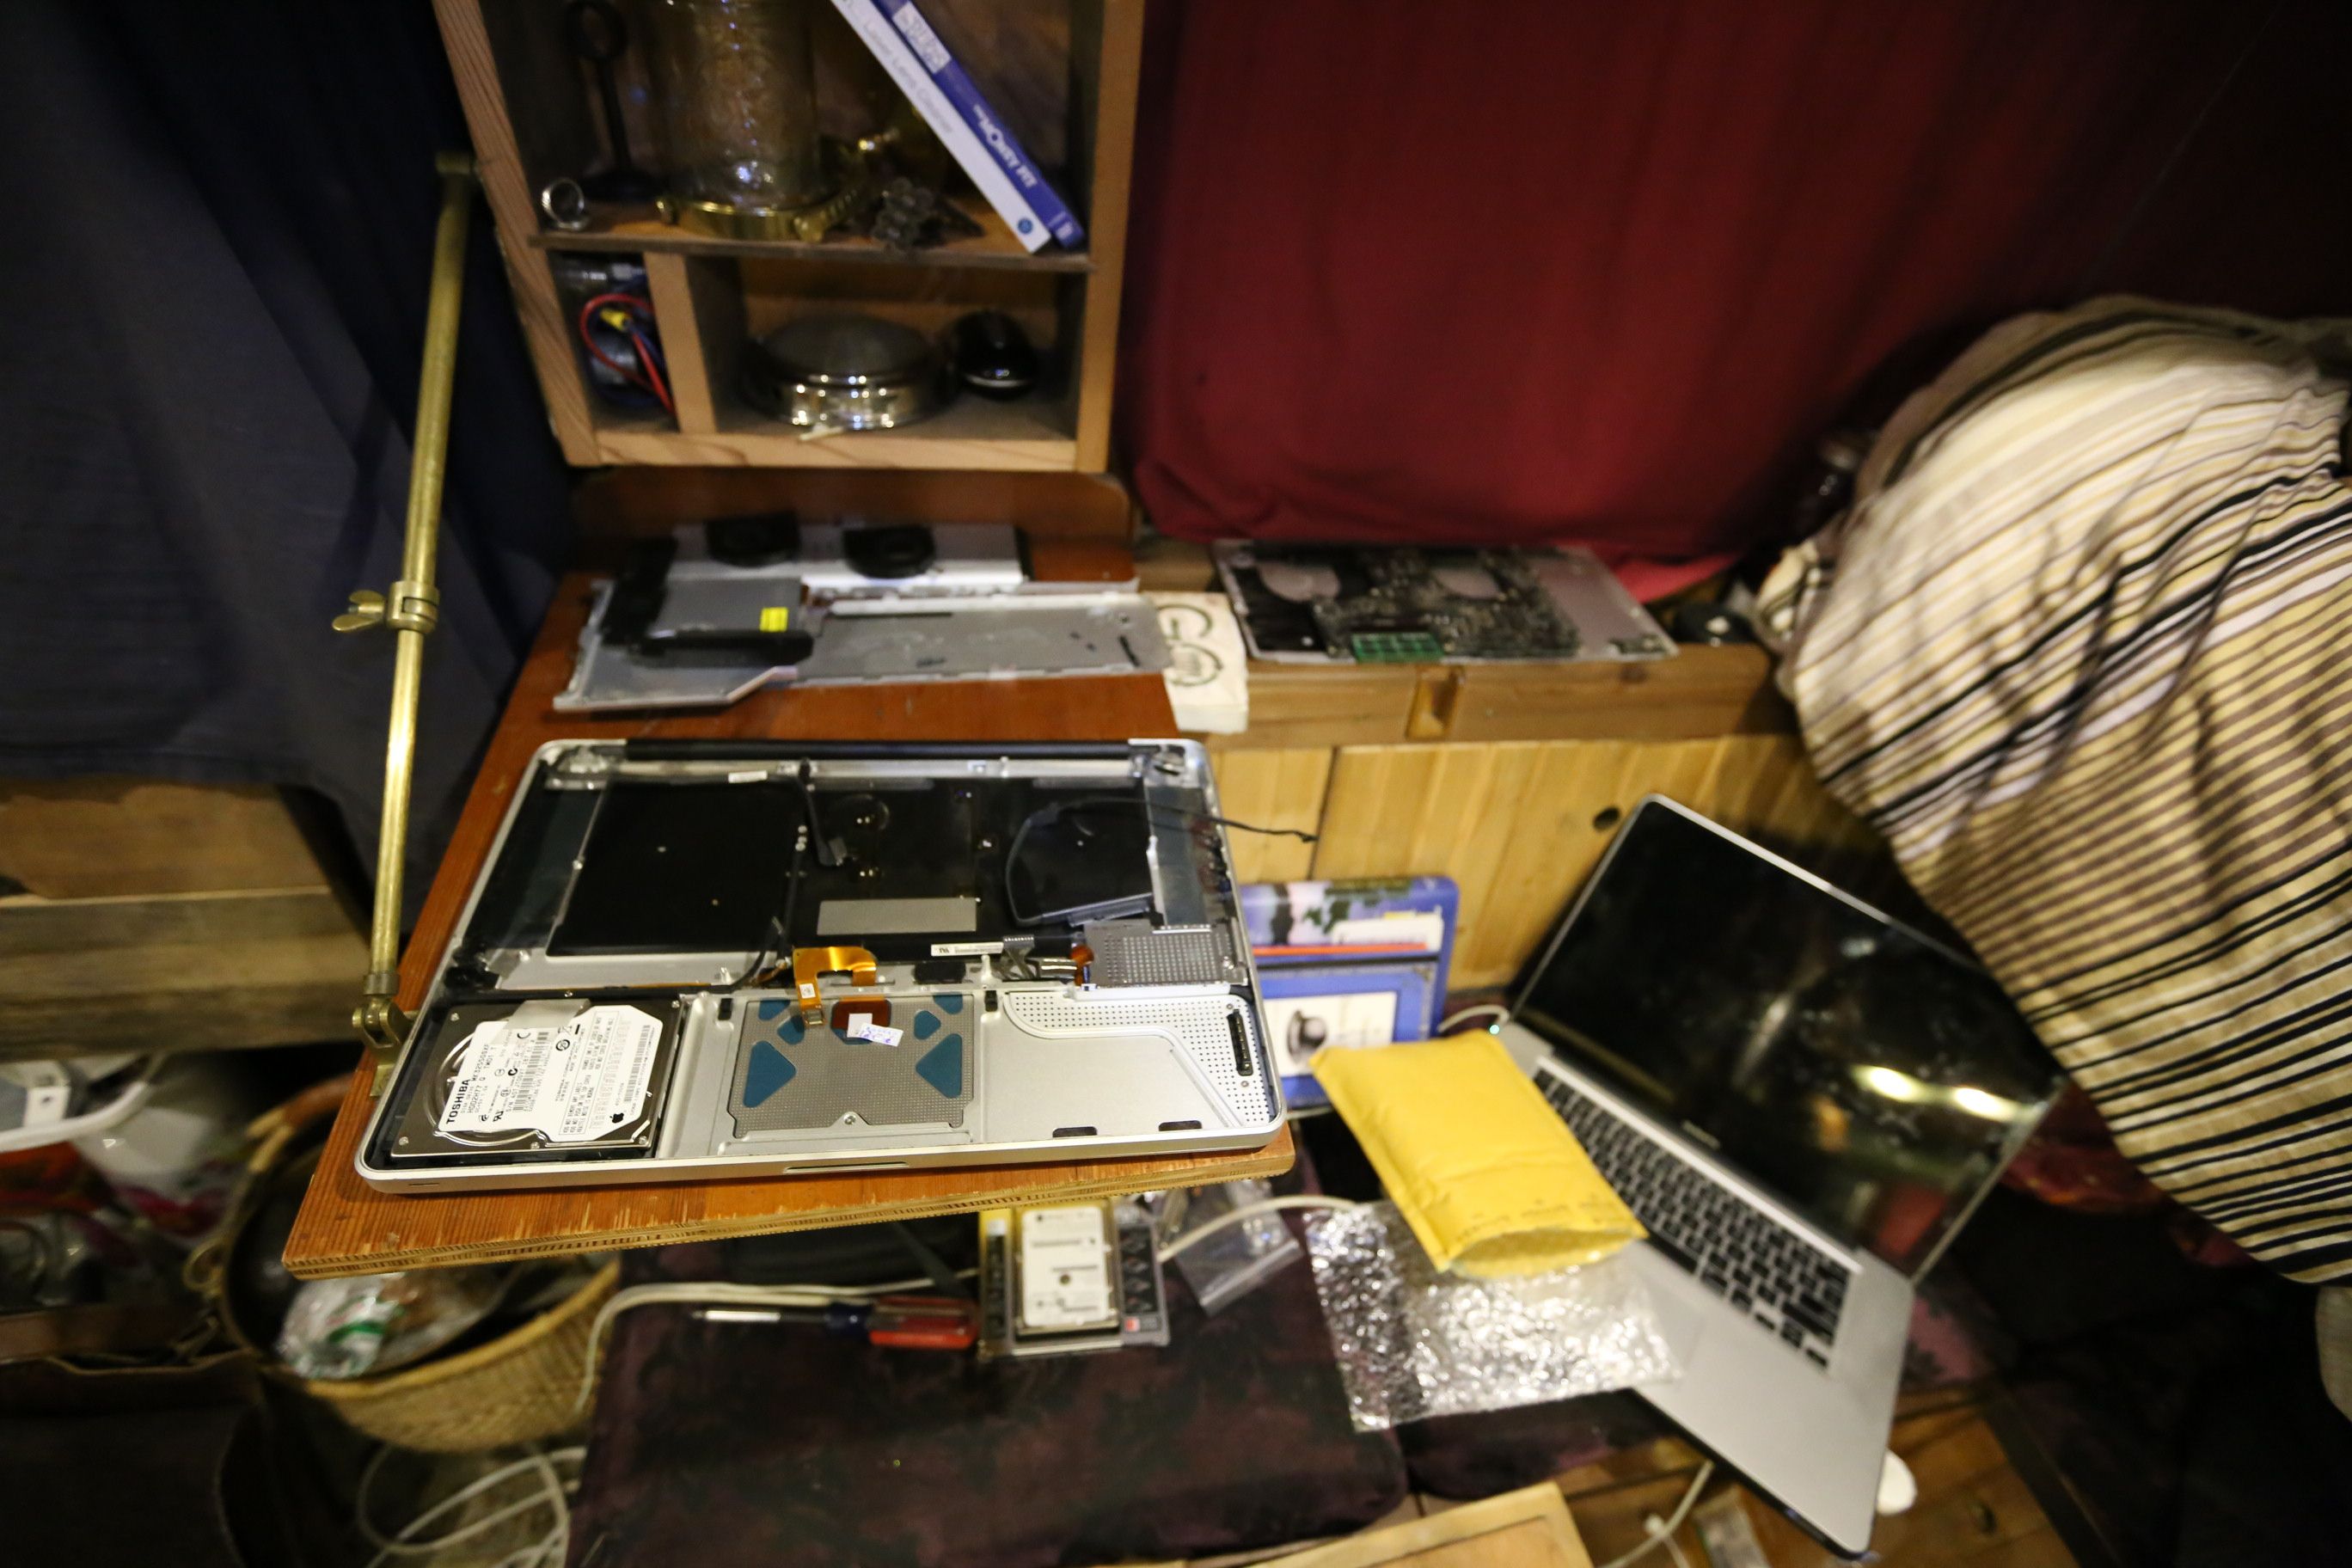
Using the fold-down desk to work on my computer.
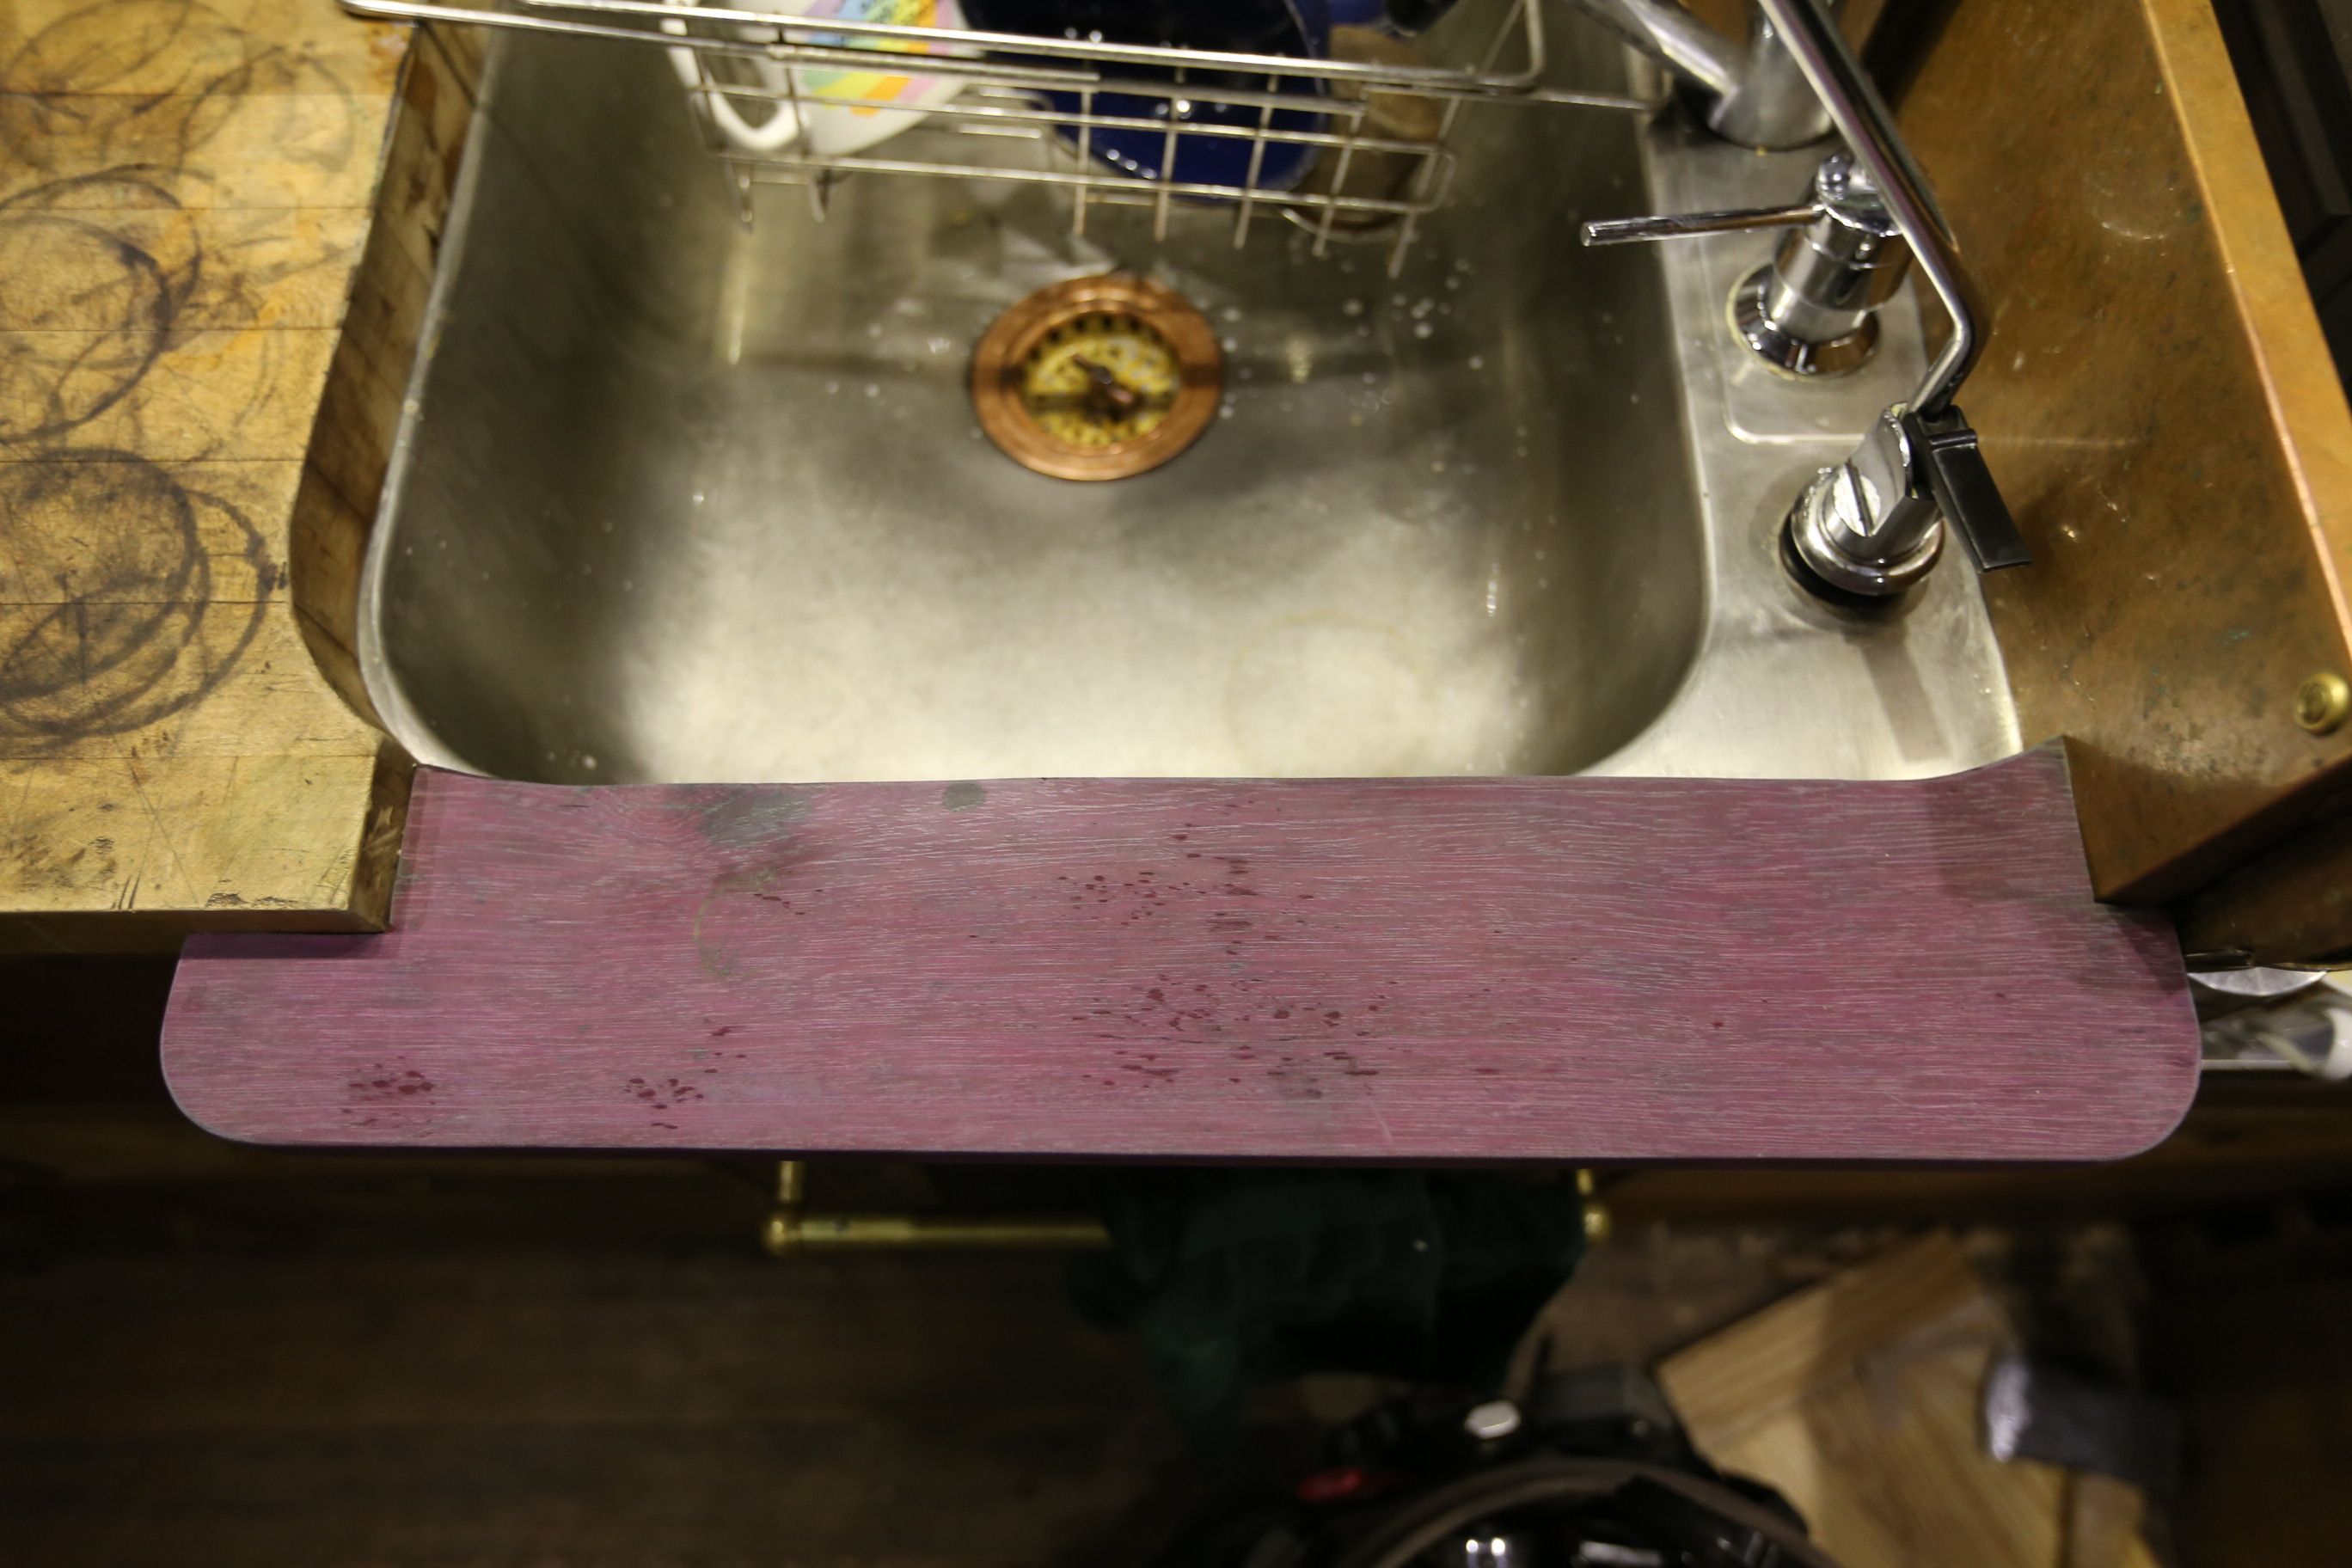
Purple heart sink shelf.
– Sink shelf – In front of the sink there has been an unfinished edge where the sink rests on the front of the cabinet frame. I had been holding onto a beautiful piece of Purple Heart for this exact project, but it was too thick. I was wanting to find a planer to thin it out, but ended up doing a fine job milling it down on the table saw. I attached the shelf using some salvaged shelf brackets to the front of the face frame, and curved the inside of the shelf to match the curve of the sink. I was worried that it might be in the way, or feel weird, since the sink is often my main perch while serving tea. But alas, the shelf looked and felt beautiful, with its purple color deepening more as the days drew on after I milled it down.
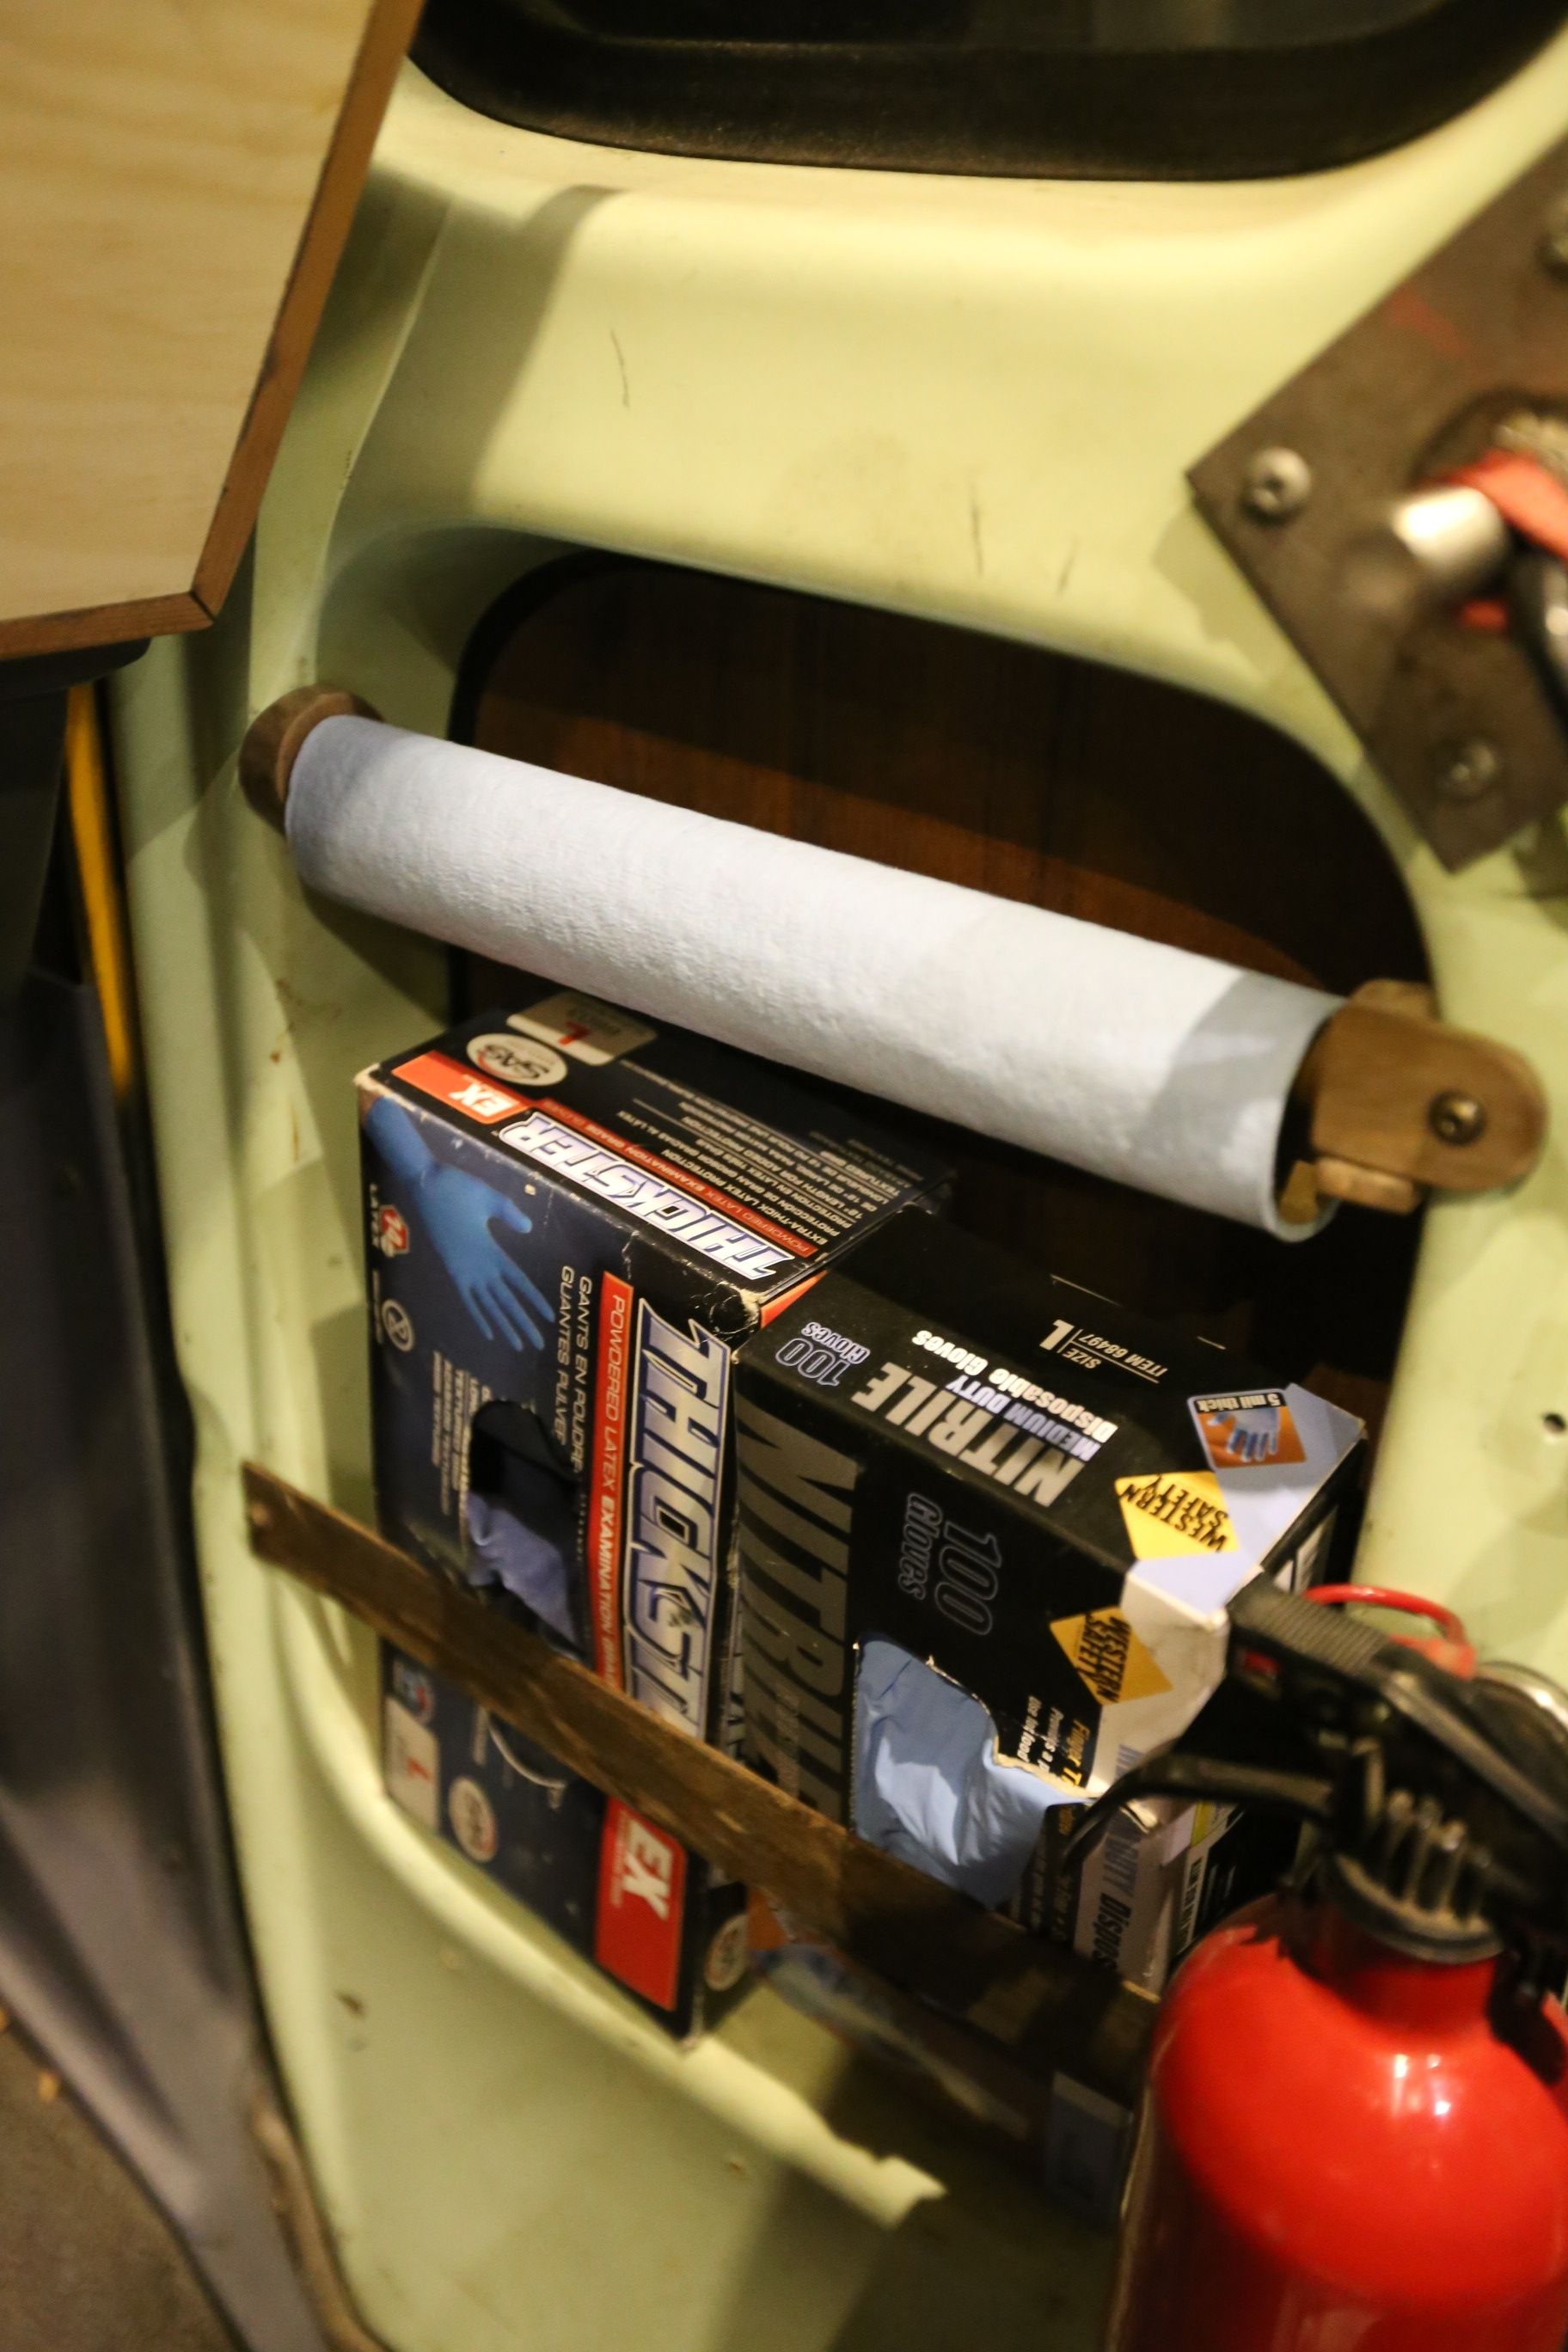
Covered window/shelf/shop towel holder.
– Covered window/shelf/towel roll – In the front of the bus there’s a small window that I don’t really use. It’s down low, and in front of the flapper doors. Many similar buses don’t even have them. I keep my tools there, so I can’t see out of it anyways. I painted a nice piece of thin plywood black on one side, and finished the other side with hemp oil/citrus thinner, and covered the window with it from the inside. It sits in a little cubby, so I put a piece of wood across the front, and now it perfectly fits boxes of rubber gloves. Above it, I added in a piece of antique brass tubing with some custom dowel holders made from salvaged hardwood to hold those blue shop towels that come on a roll like paper towels. It fits perfectly, and you can get a towel out without even lifting the hinged shelf above/in front of it.

Ceiling trim.
– Ceiling trim – I had done most of my ceiling trim a couple years ago, but had left a little unfinished – mostly above the bed where no one but myself saw it. I had also broken a piece of ceiling trim at one point, and cut another too short when closet plans had changed mid-build. I decided to get all this wrapped up and finished, along with some stainless guides for the line in my bed pulley system. The ceiling trim is Ipe (which is kind of like a plastic of the forest) cut into thin strips and screwed in.
– Wood Stove Rebuild – I love my little stove, but it was running so hot, and I noticed that a lot of the sealant was starting to come out. My theory is that since my wood stove sat in a barn for seven years after being built, that the stove cement never cured right because it really needs to be fired to cure fully. This left it in a vulnerable spot. That, along with the many bumps in the road, had taken its toll. Andrew Moore, the stove-maker, suggested that a rebuild was too hard and that just resealing it would be sufficient. When I took it out, I realized how bad the cement was coming out, so I decided on the full rebuild. I looked online to see what people had to say about it and just did it. It’s pretty much just four sides clamped together between the top and bottom by four long stainless bolts that run through the inside of the stove. After complete disassembly, I cleaned out all the old cement with wire brushes, cleaned all the pieces, and used some denatured alcohol where any cement was to go. To rebuild, I started by putting cement around the perimeter of the bottom, put the two long side upright in the cemented bottom (had a friend hold them), cemented the grooves in the other two sides, put them in place, duct-taped all the corners, ran my wet (and gloved) finger along the seams to smooth out the cement, cemented the top perimeter, put it on, and ran the bolts through the stove and tightened them enough to get some cement to squish out, but not all of it. I cleaned up all the seams while it was still wet and let it dry inside the house. The one big problem that I ran into was that one of the sides was slightly taller than the other sides. It must have been done this way in the casting process, or perhaps when Andrew cleaned up the castings. But it kind of messed up my cement job in that it made the stove a little less stable while I got it all squared up. I ended up having to come back in and reseal a place or two once the first layer of cement was dry. Next, I refinished the stove with a nice black stove polish. My stove tends to see a bit of water because it’s right next to the sink, so I try to polish it once a year or so to keep the rust to a minimum. The next day when I got it all back installed, and I did my first firing, it was super weird how many of the seams started to steam. I’m not sure if this is normal or not, but it might have been because the cement still wasn’t totally dry. I’m not sure. It’s held up since, so I’m not too worried.
Wood stove rebuild photos:

Tea Menu! Stained with Pu-erh.
– Tea-staining – Throughout all this, Ally and I got into some tea staining, starting with some paper for our new tea menus, and getting into my bed sheets, and some of her clothes. Over-steeping and boiling tea draws out tannins. Tannins give many dark woods their rich colors, which makes tea great for staining all sorts of things from fabric to wood to paper. I have been working on a tea menu for the past year, formulating ideas, making sure I can get all the teas from our sponsors on a regular basis, doing design and layout, etc. This summer I was given some bi-fold menu covers (Thanks Ric and Joan!), which were perfect for my project. The menu has a sweet cover with art by Catherine Moore (where most of our website and sticker art has come from) and teas from Mountain Rose Herbs, Eco Teas, and Organic India. The inside carries a big selection of caffeinated and non-caffeinated teas, spices, herbs, and blends. The back cover highlights many of the people who help support the teabus.

Boiling various teas for tea-staining.

Brewing several gallons of tea for staining.
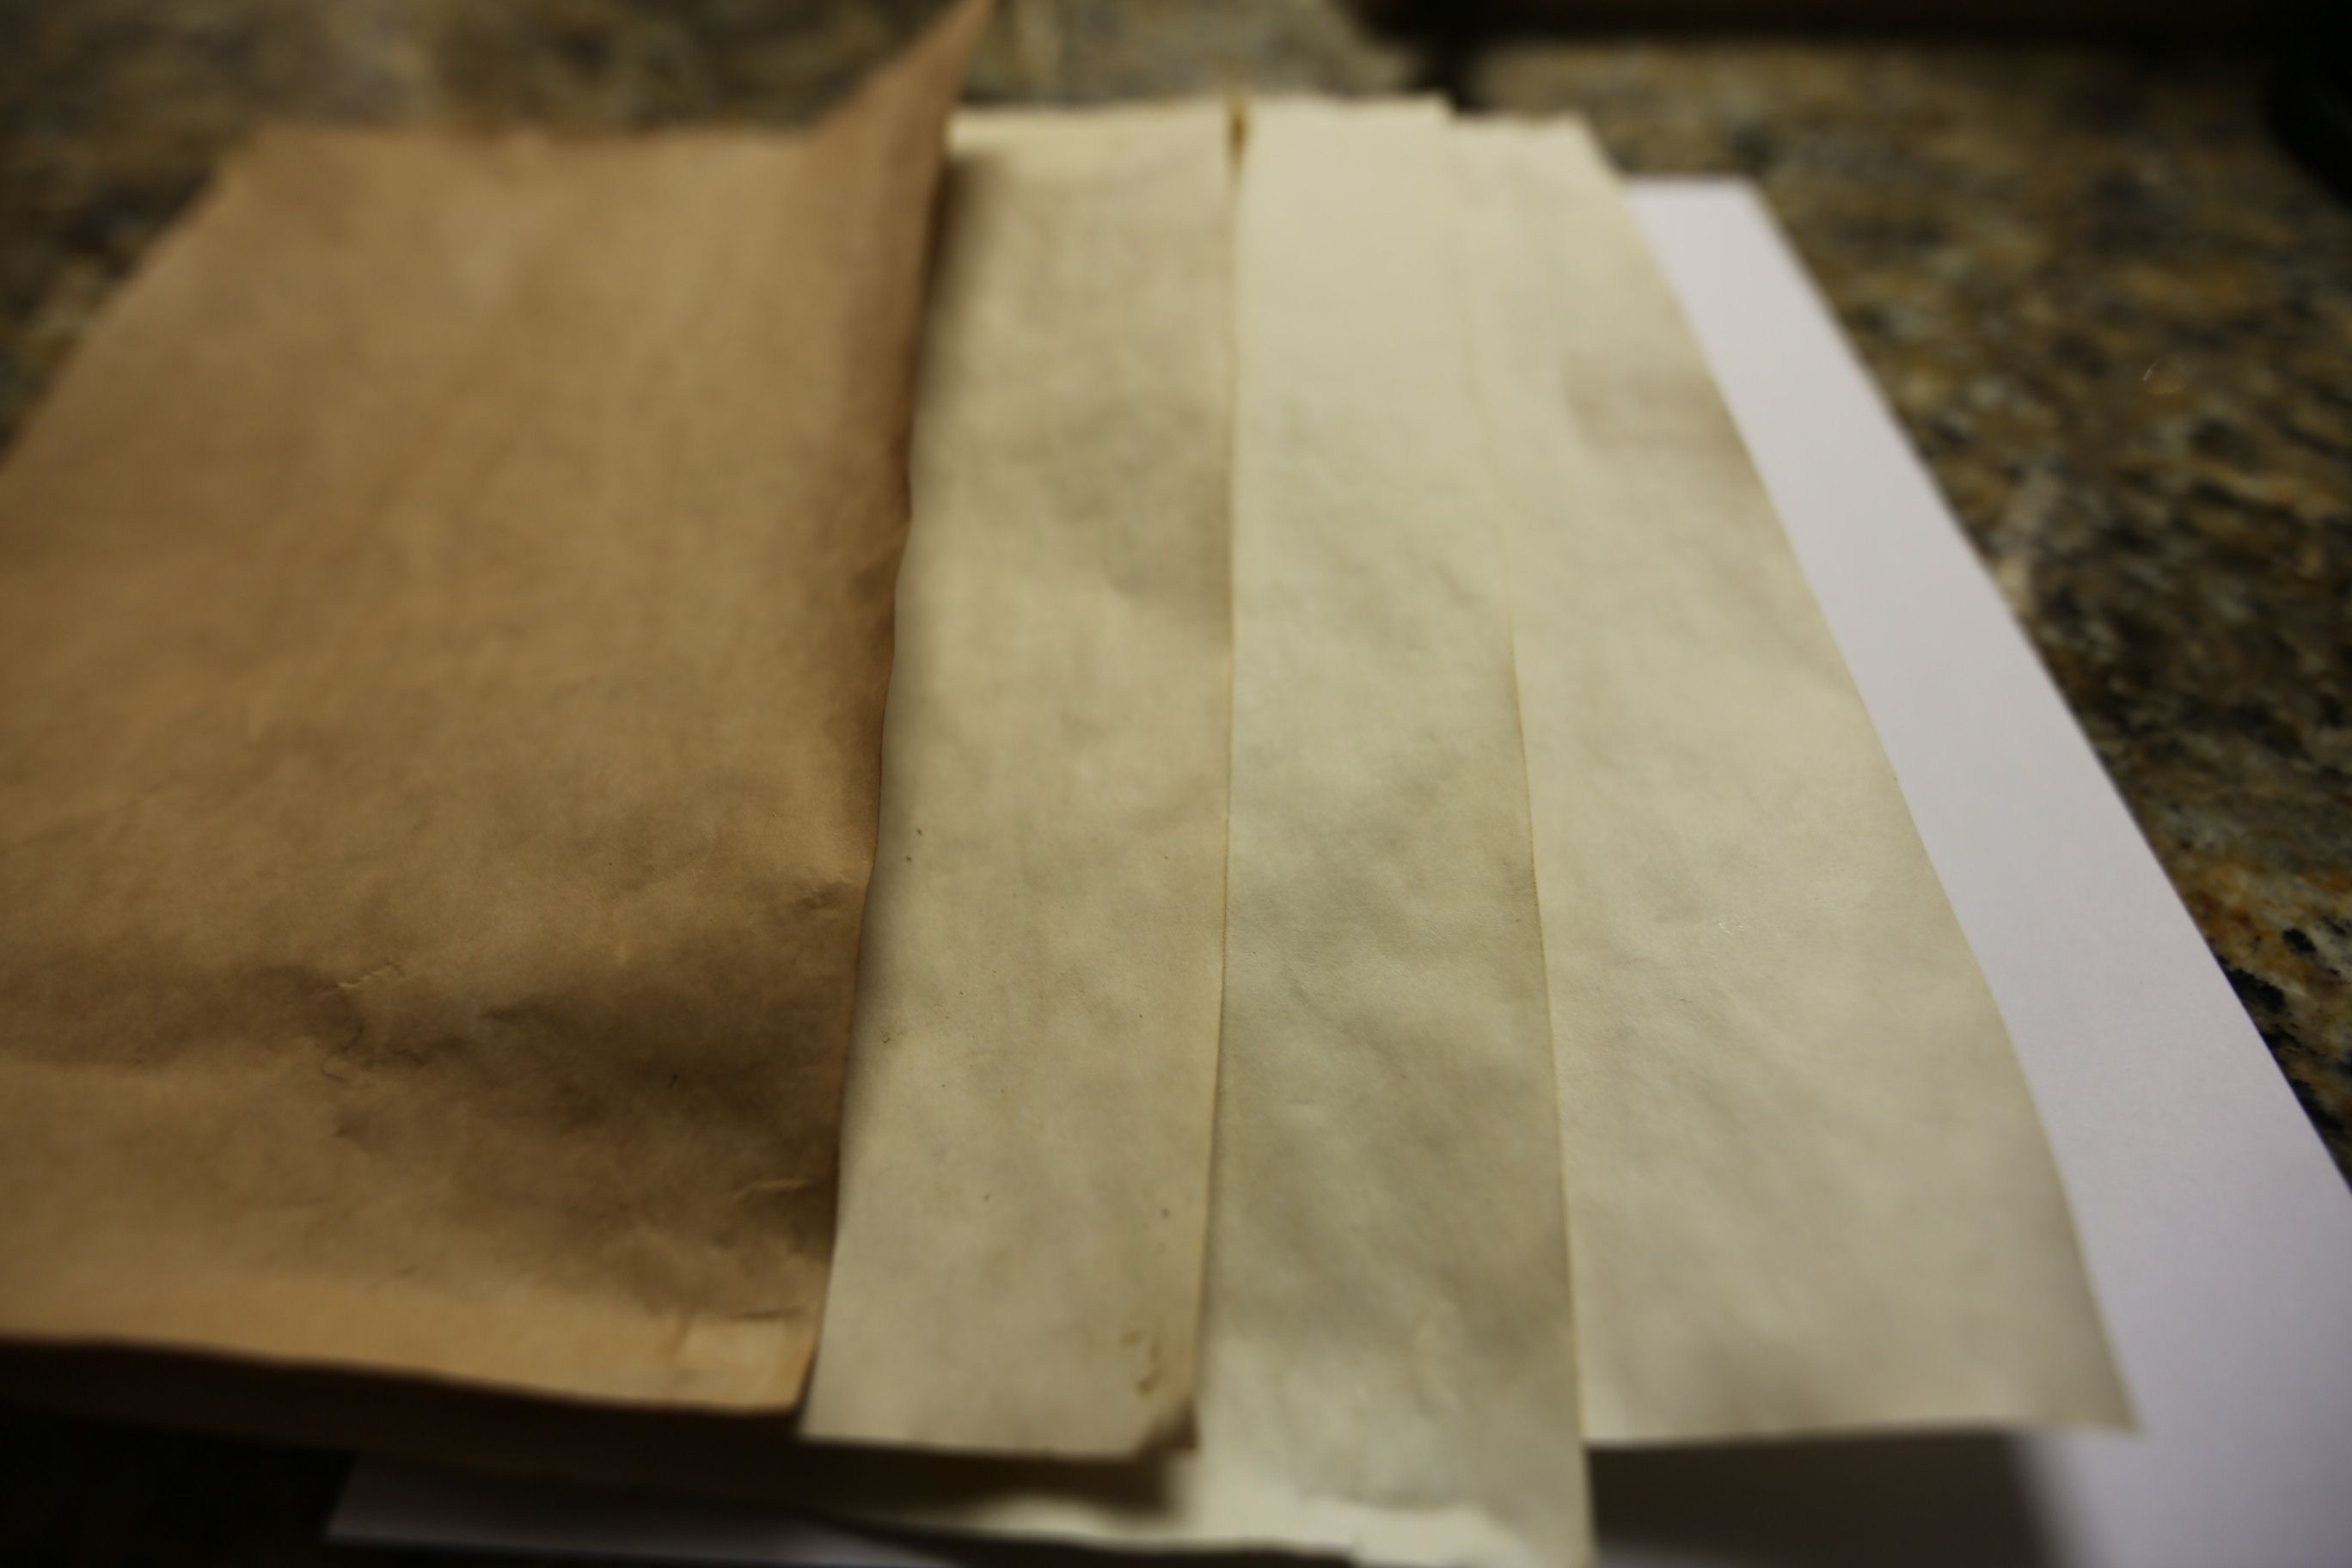
Tea stained paper: Pu’erh, Early Grey, Darjeeling, Houjicha, blank.
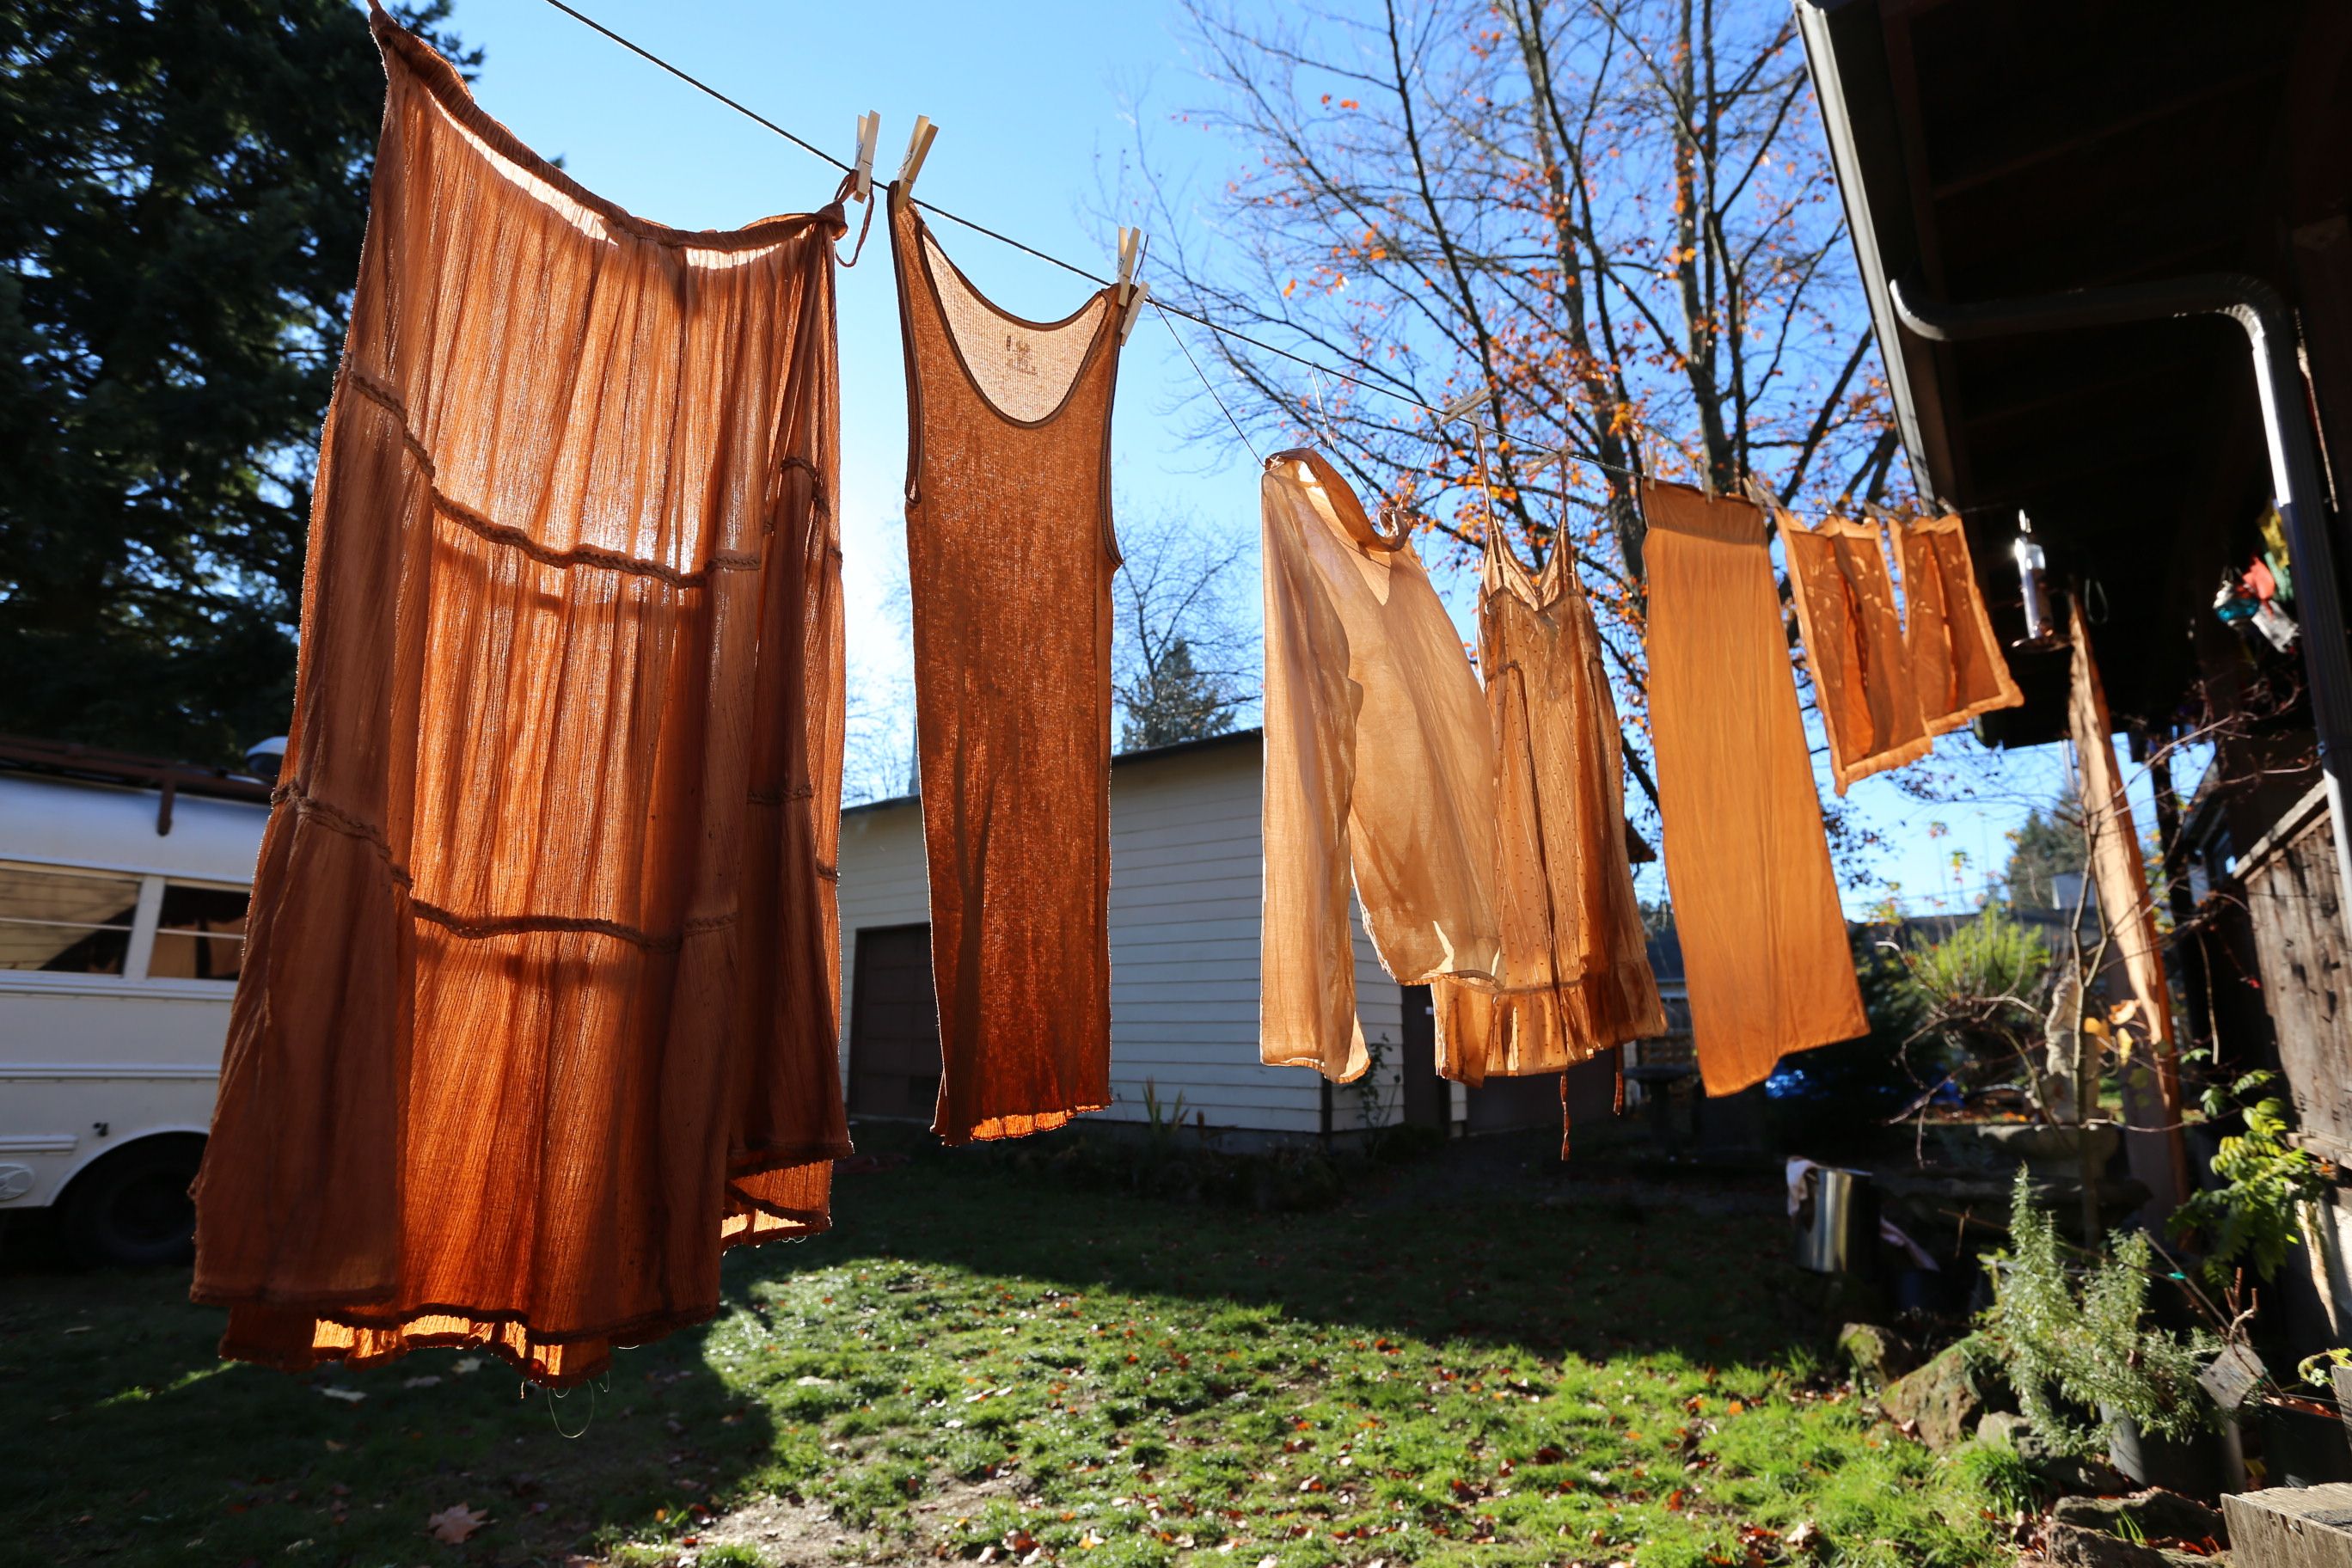
Tea-stained clothes

Inverter mounted under co-pilot chair.
– Inverter – This was another major step. I had been hauling around and storing this great inverter for a couple years, but finally got everything ready to install. It is mounted underneath the copilot chair in a cabinet with built in ventilation and easy access. I had to drill down through the floor into the battery compartment below, line the hole with PVC pipe, and wire everything up with a fuse, large 2/0 cable, lugs, and heat shrink tubing. This inverter is awesome because it provides the bus with up to 1000 watts of pure sine wave 110v power. This makes it possible to run all sorts of regular household things. I will use it mostly to charge 18v power tools, run my computer, etc. Make/Model: Xantrex ProSine 1000.

Inverter cables ready to go.
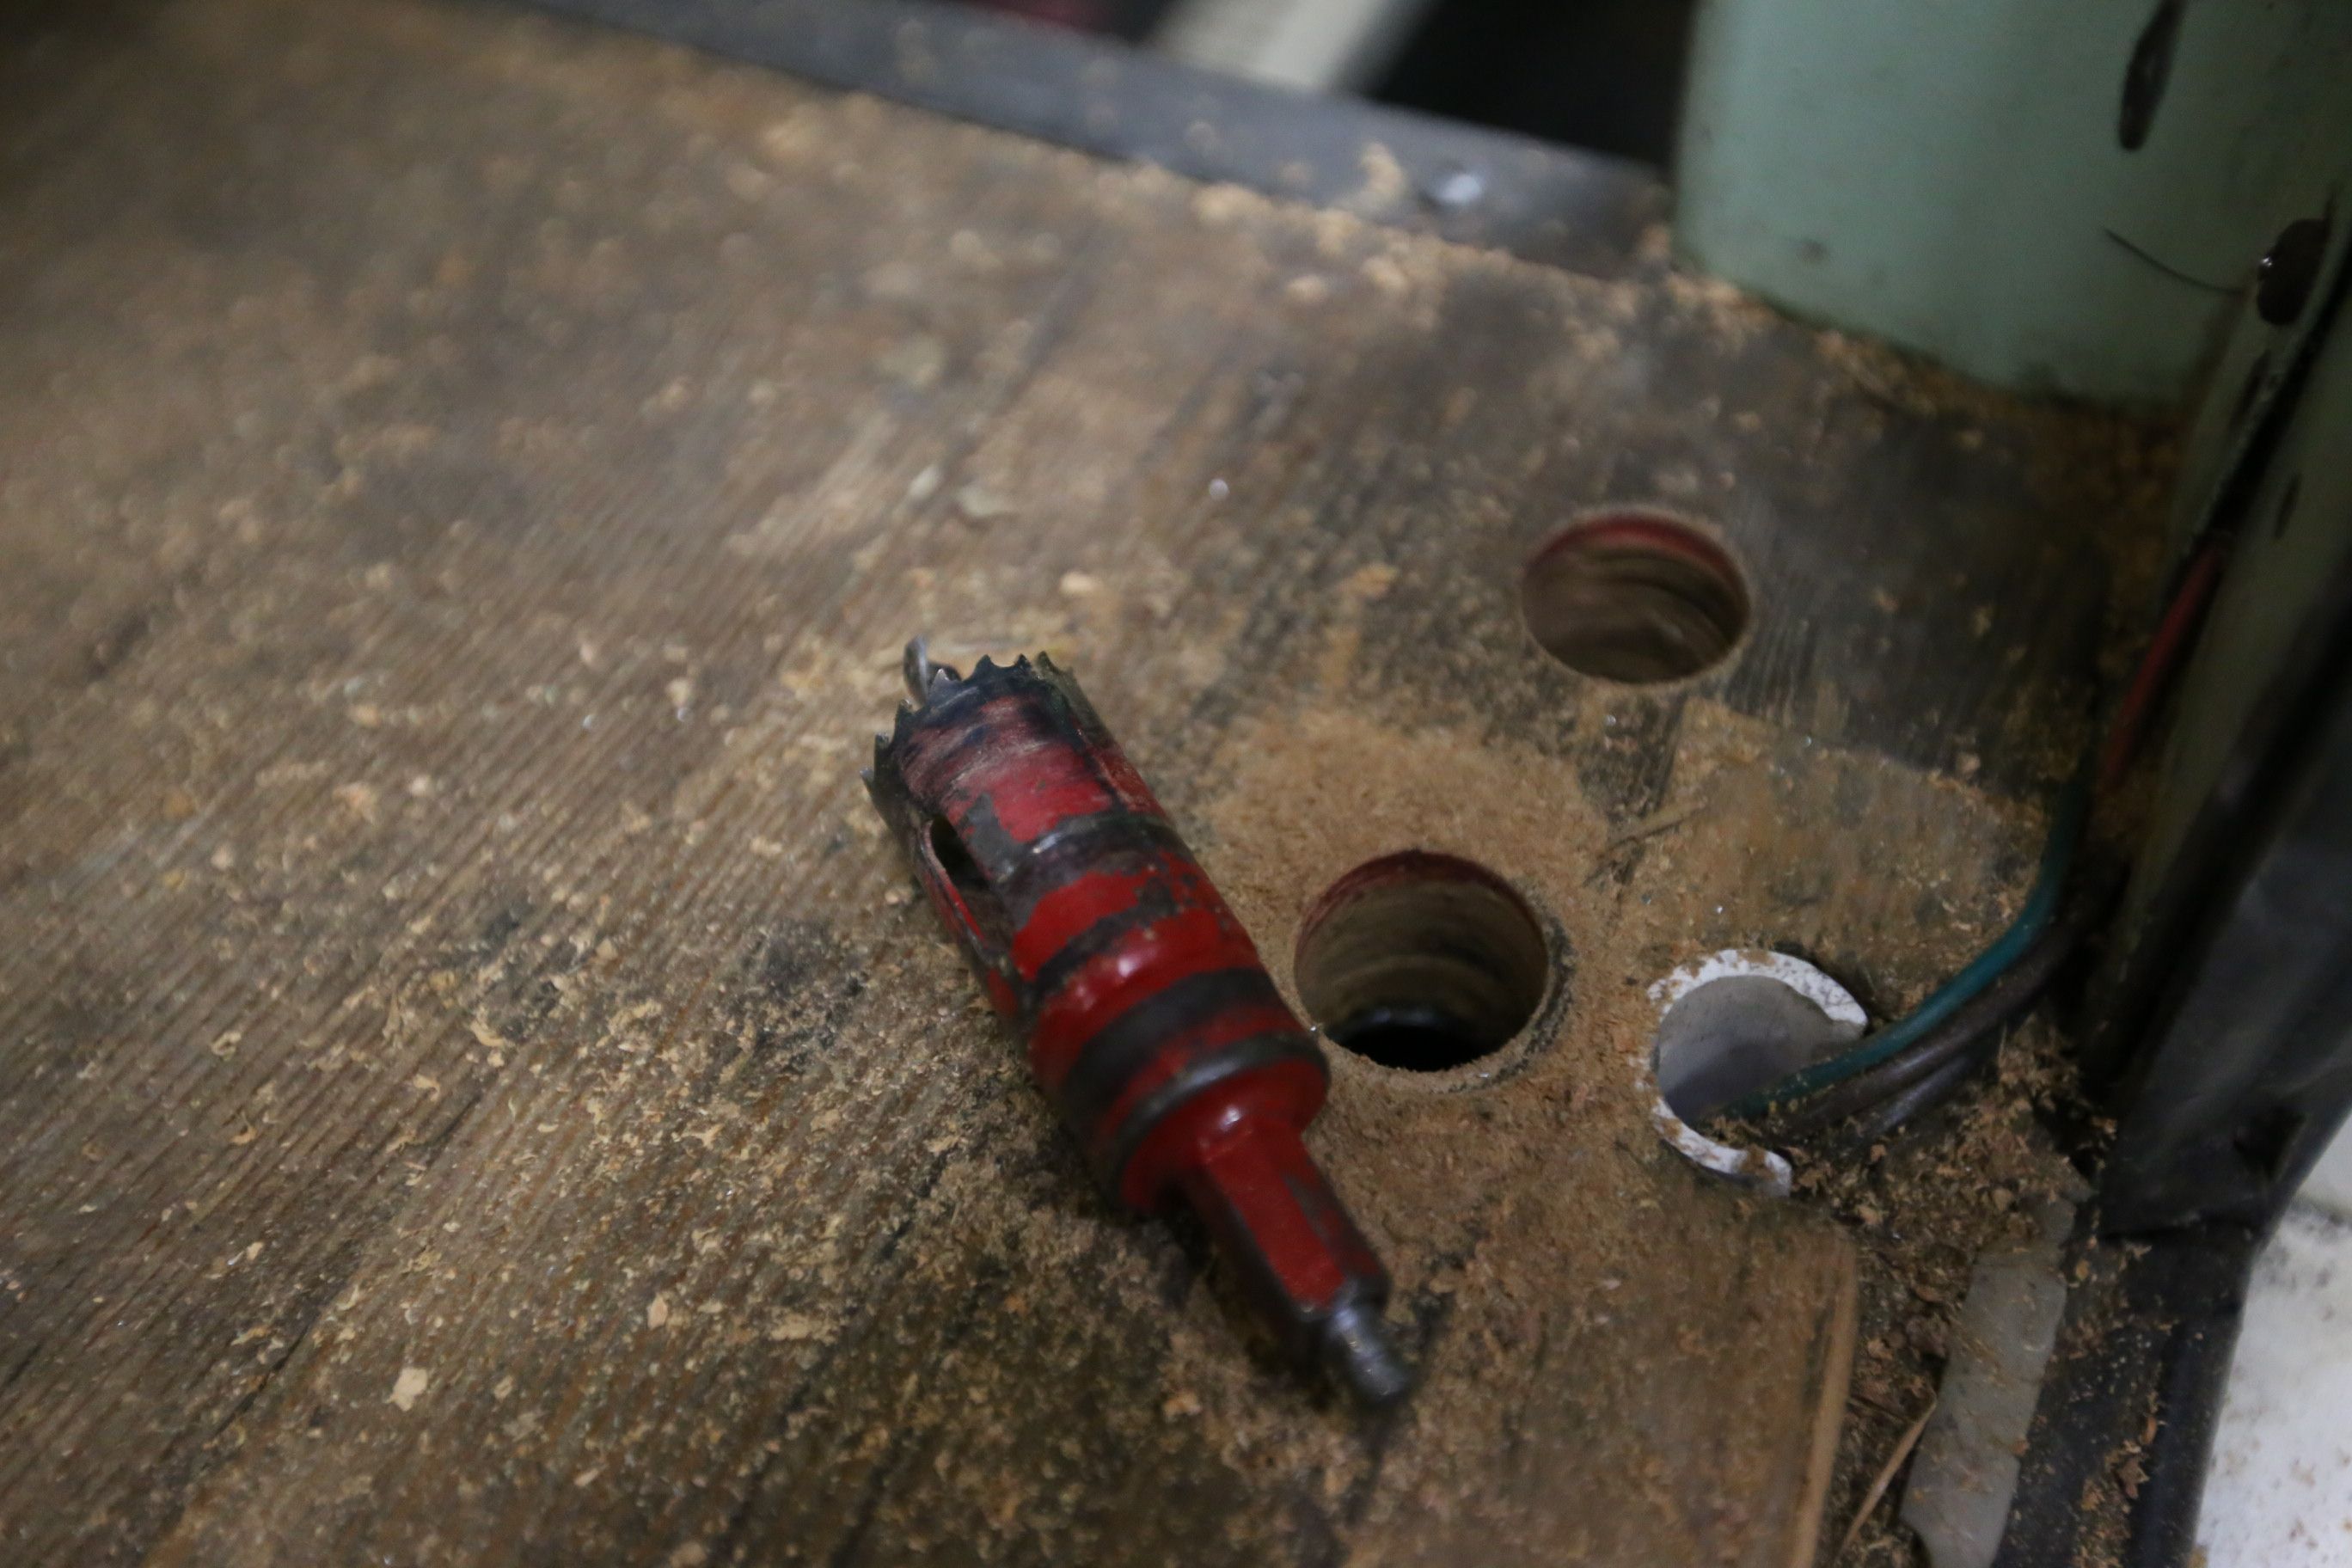
Holes for the inverter cables to the batteries below.

Crimping the lug on the inverter cables.
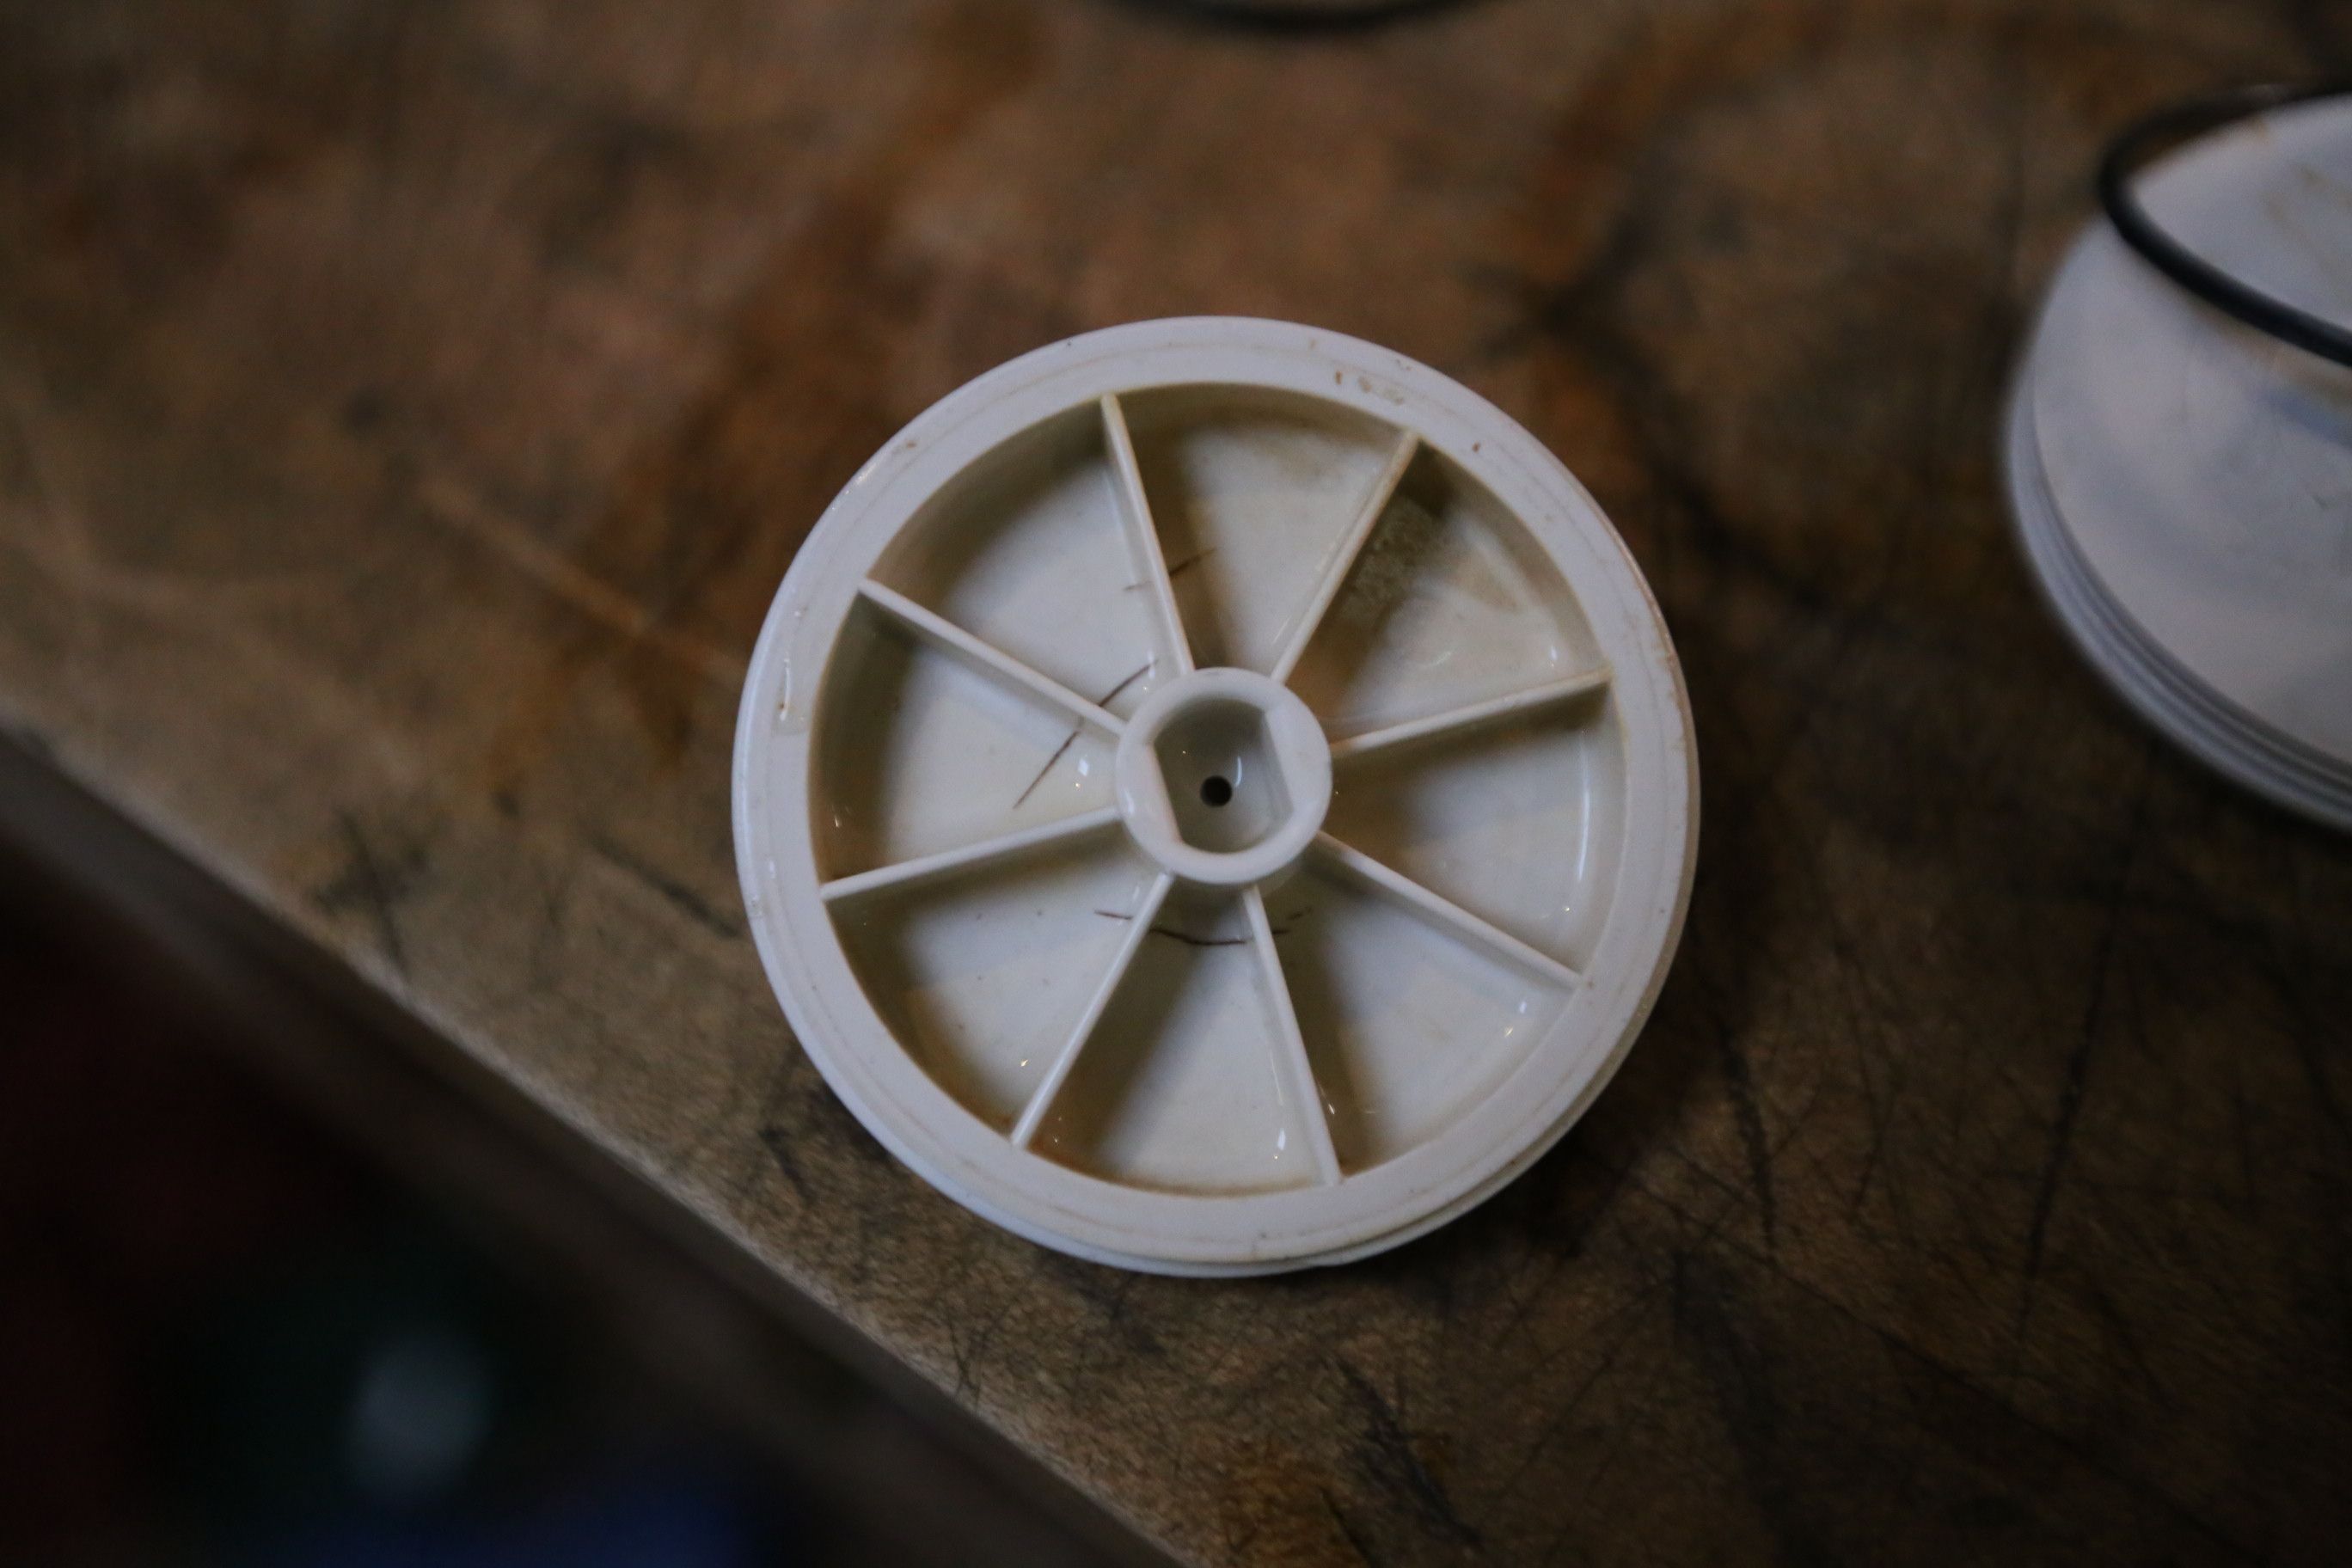
Broken water filter cap.
– Miscellaneous – Cork board in the closet for hanging souvenirs, a rack inside a food storage cabinet for easier access to food, a door for the guitar slot and a trim piece above it, a fold down shelf on the inside of the back door for putting things on/working on projects, fixed the water filter (which keeps cracking – anyone want to sponsor us with a new water filter?), a new handle for helping people get into the bus through the big side door, and probably many more things that I just can’t remember.
MECAHNICAL/ELECTRICAL
– Rear Differential – drained, cleaned, and refilled. Added a temperature sensor.
– Transmission – drained (including the torque converter), new filter, new pan (with a drain plug – yay!), refilled. Changed out the old temp sensor with a new one.
– Oil Change – Just the basic

New starting batteries/hold-downs.
– New Batteries – My old ones were pretty much toast. I decided to upgrade the way my battery cables attach to the batteries. To do this, I took some pieces that clamped on battery posts and gave them ¼”-20 threaded posts, and on my cables, I crimped on lug ends. This makes it incredibly easy to hook up or unhook my batteries. It’s just a wing nut on each terminal. I also upgraded the ground on one of my batteries to 2/0. Everything else was 2/0, just not that one. I also bought new universal battery hold-downs. I had been riggin up all sort of things to hold down the batteries for years because I never had the original hold-downs. Finally, I bit the bullet and bought some new (adjustable) pieces of plastic (I hate buying plastic). With a few modifications, they worked great!
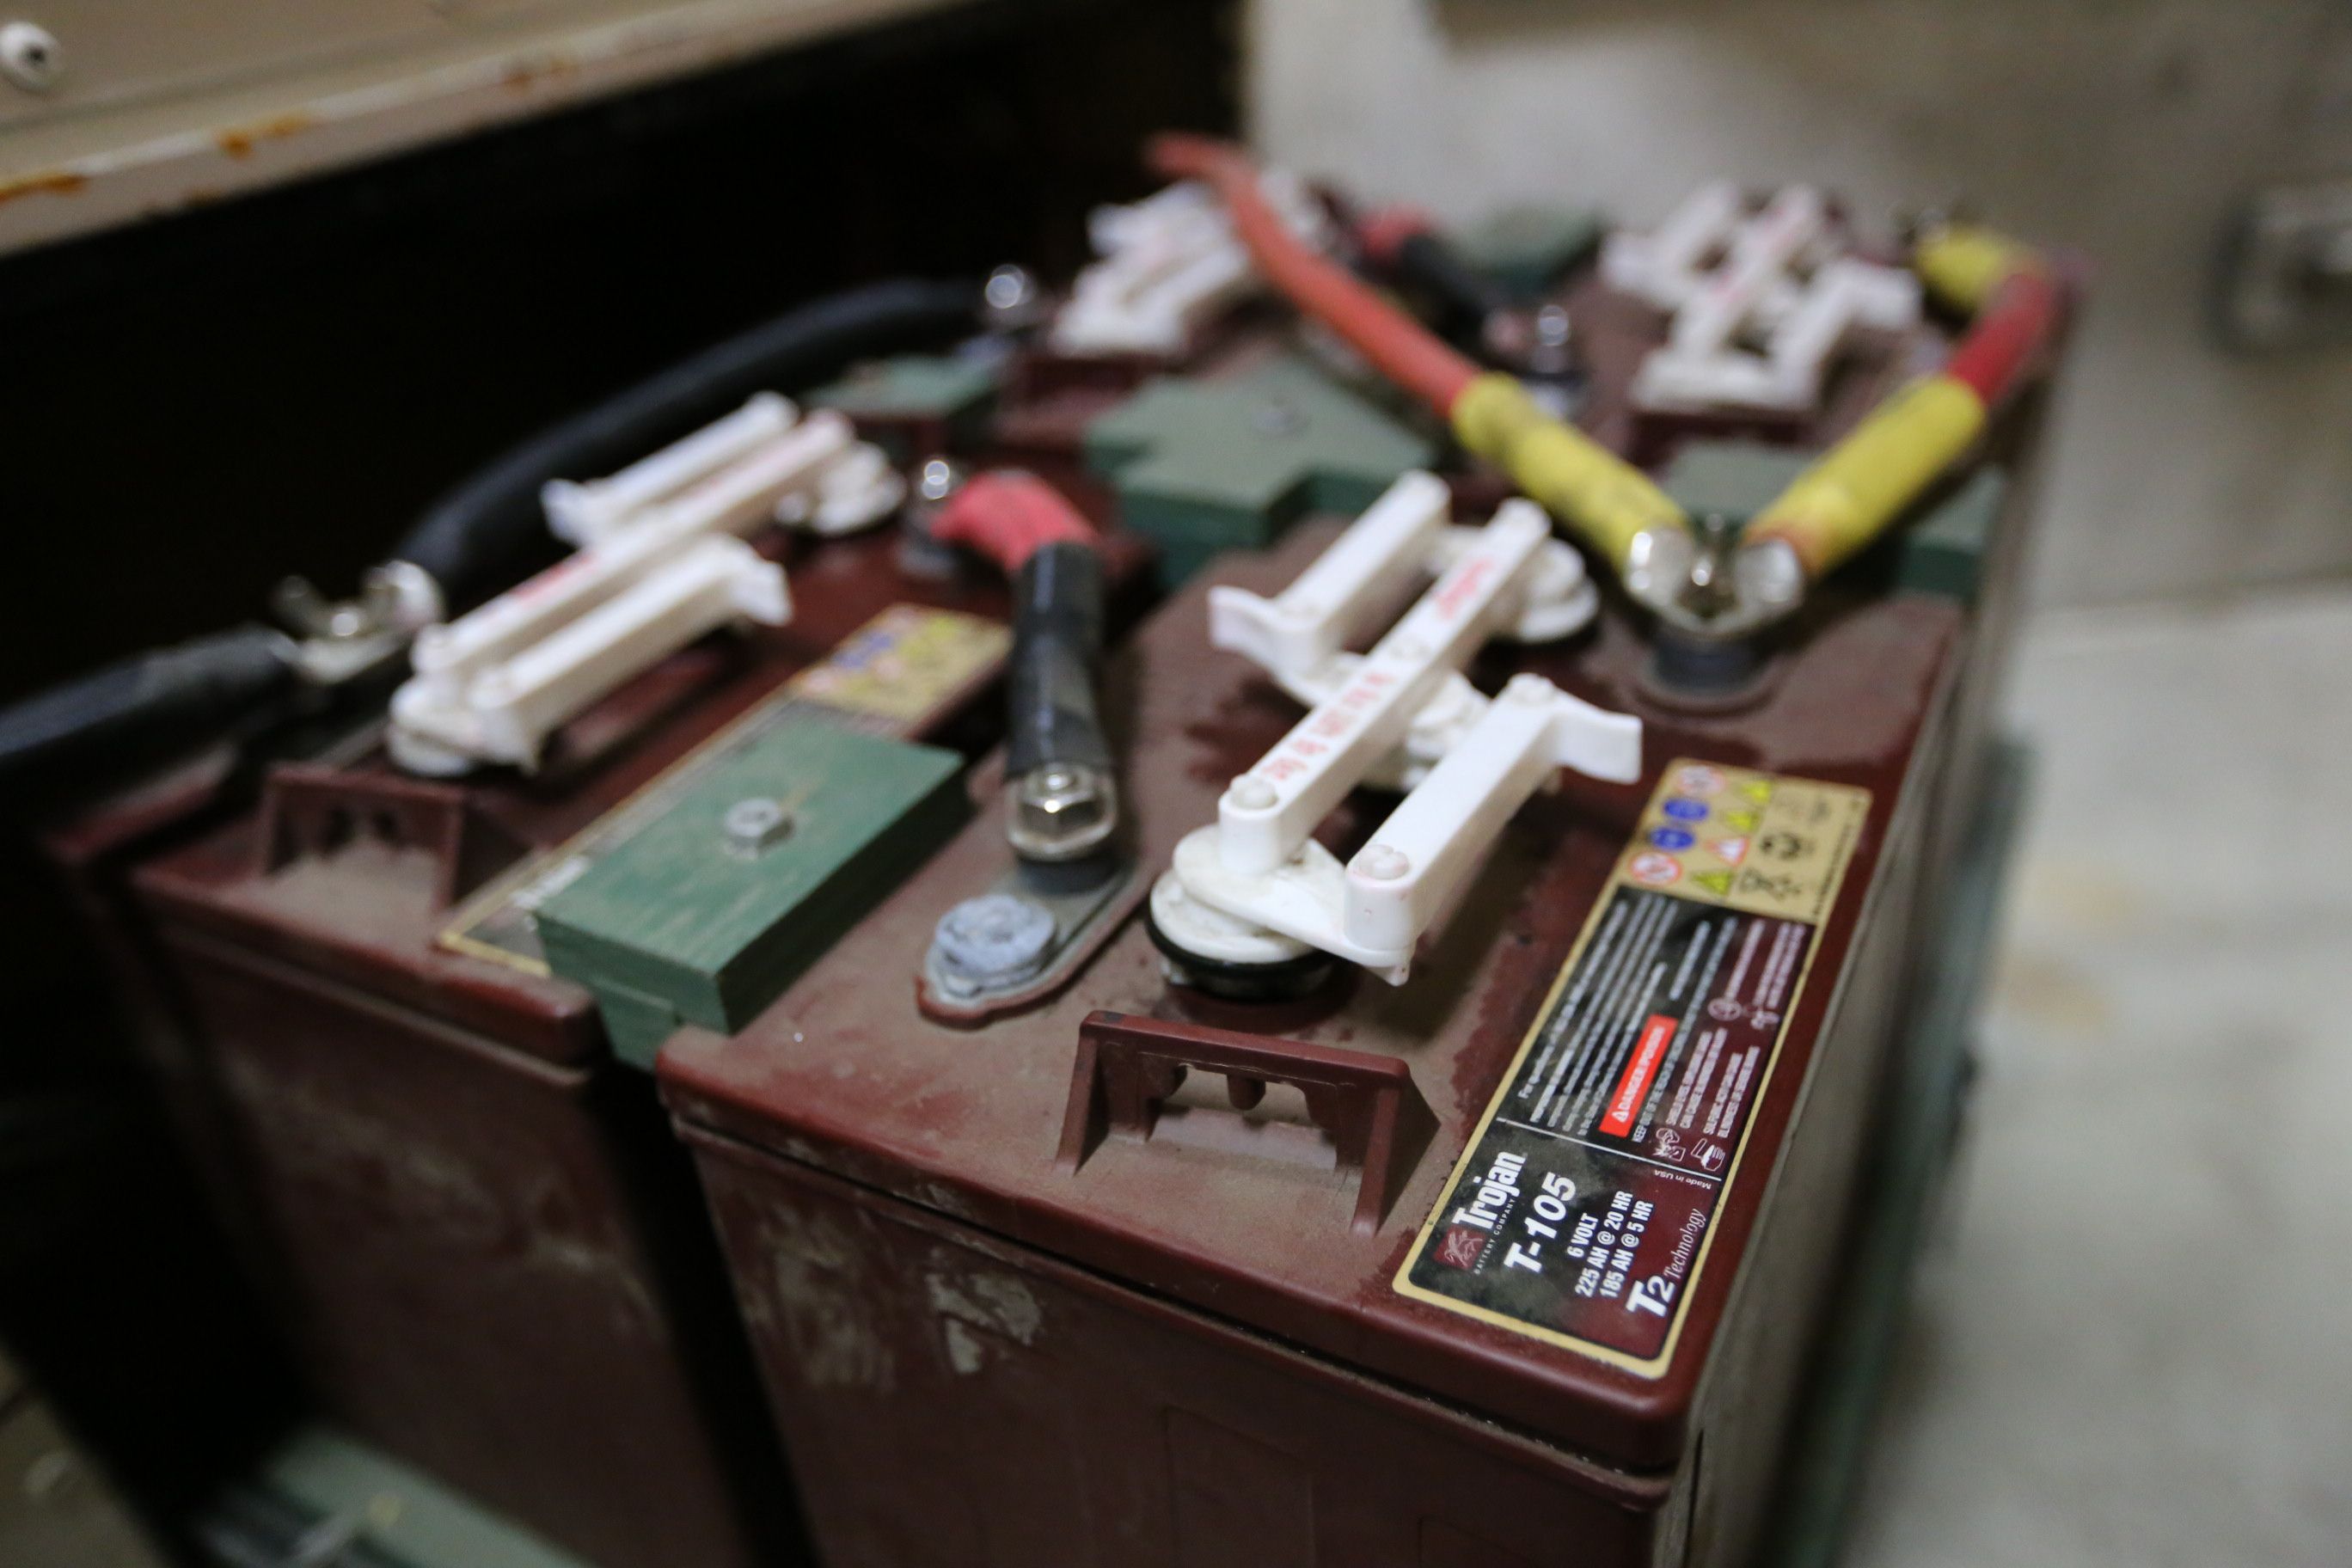
Old leaky caps on the solar/house batteries.
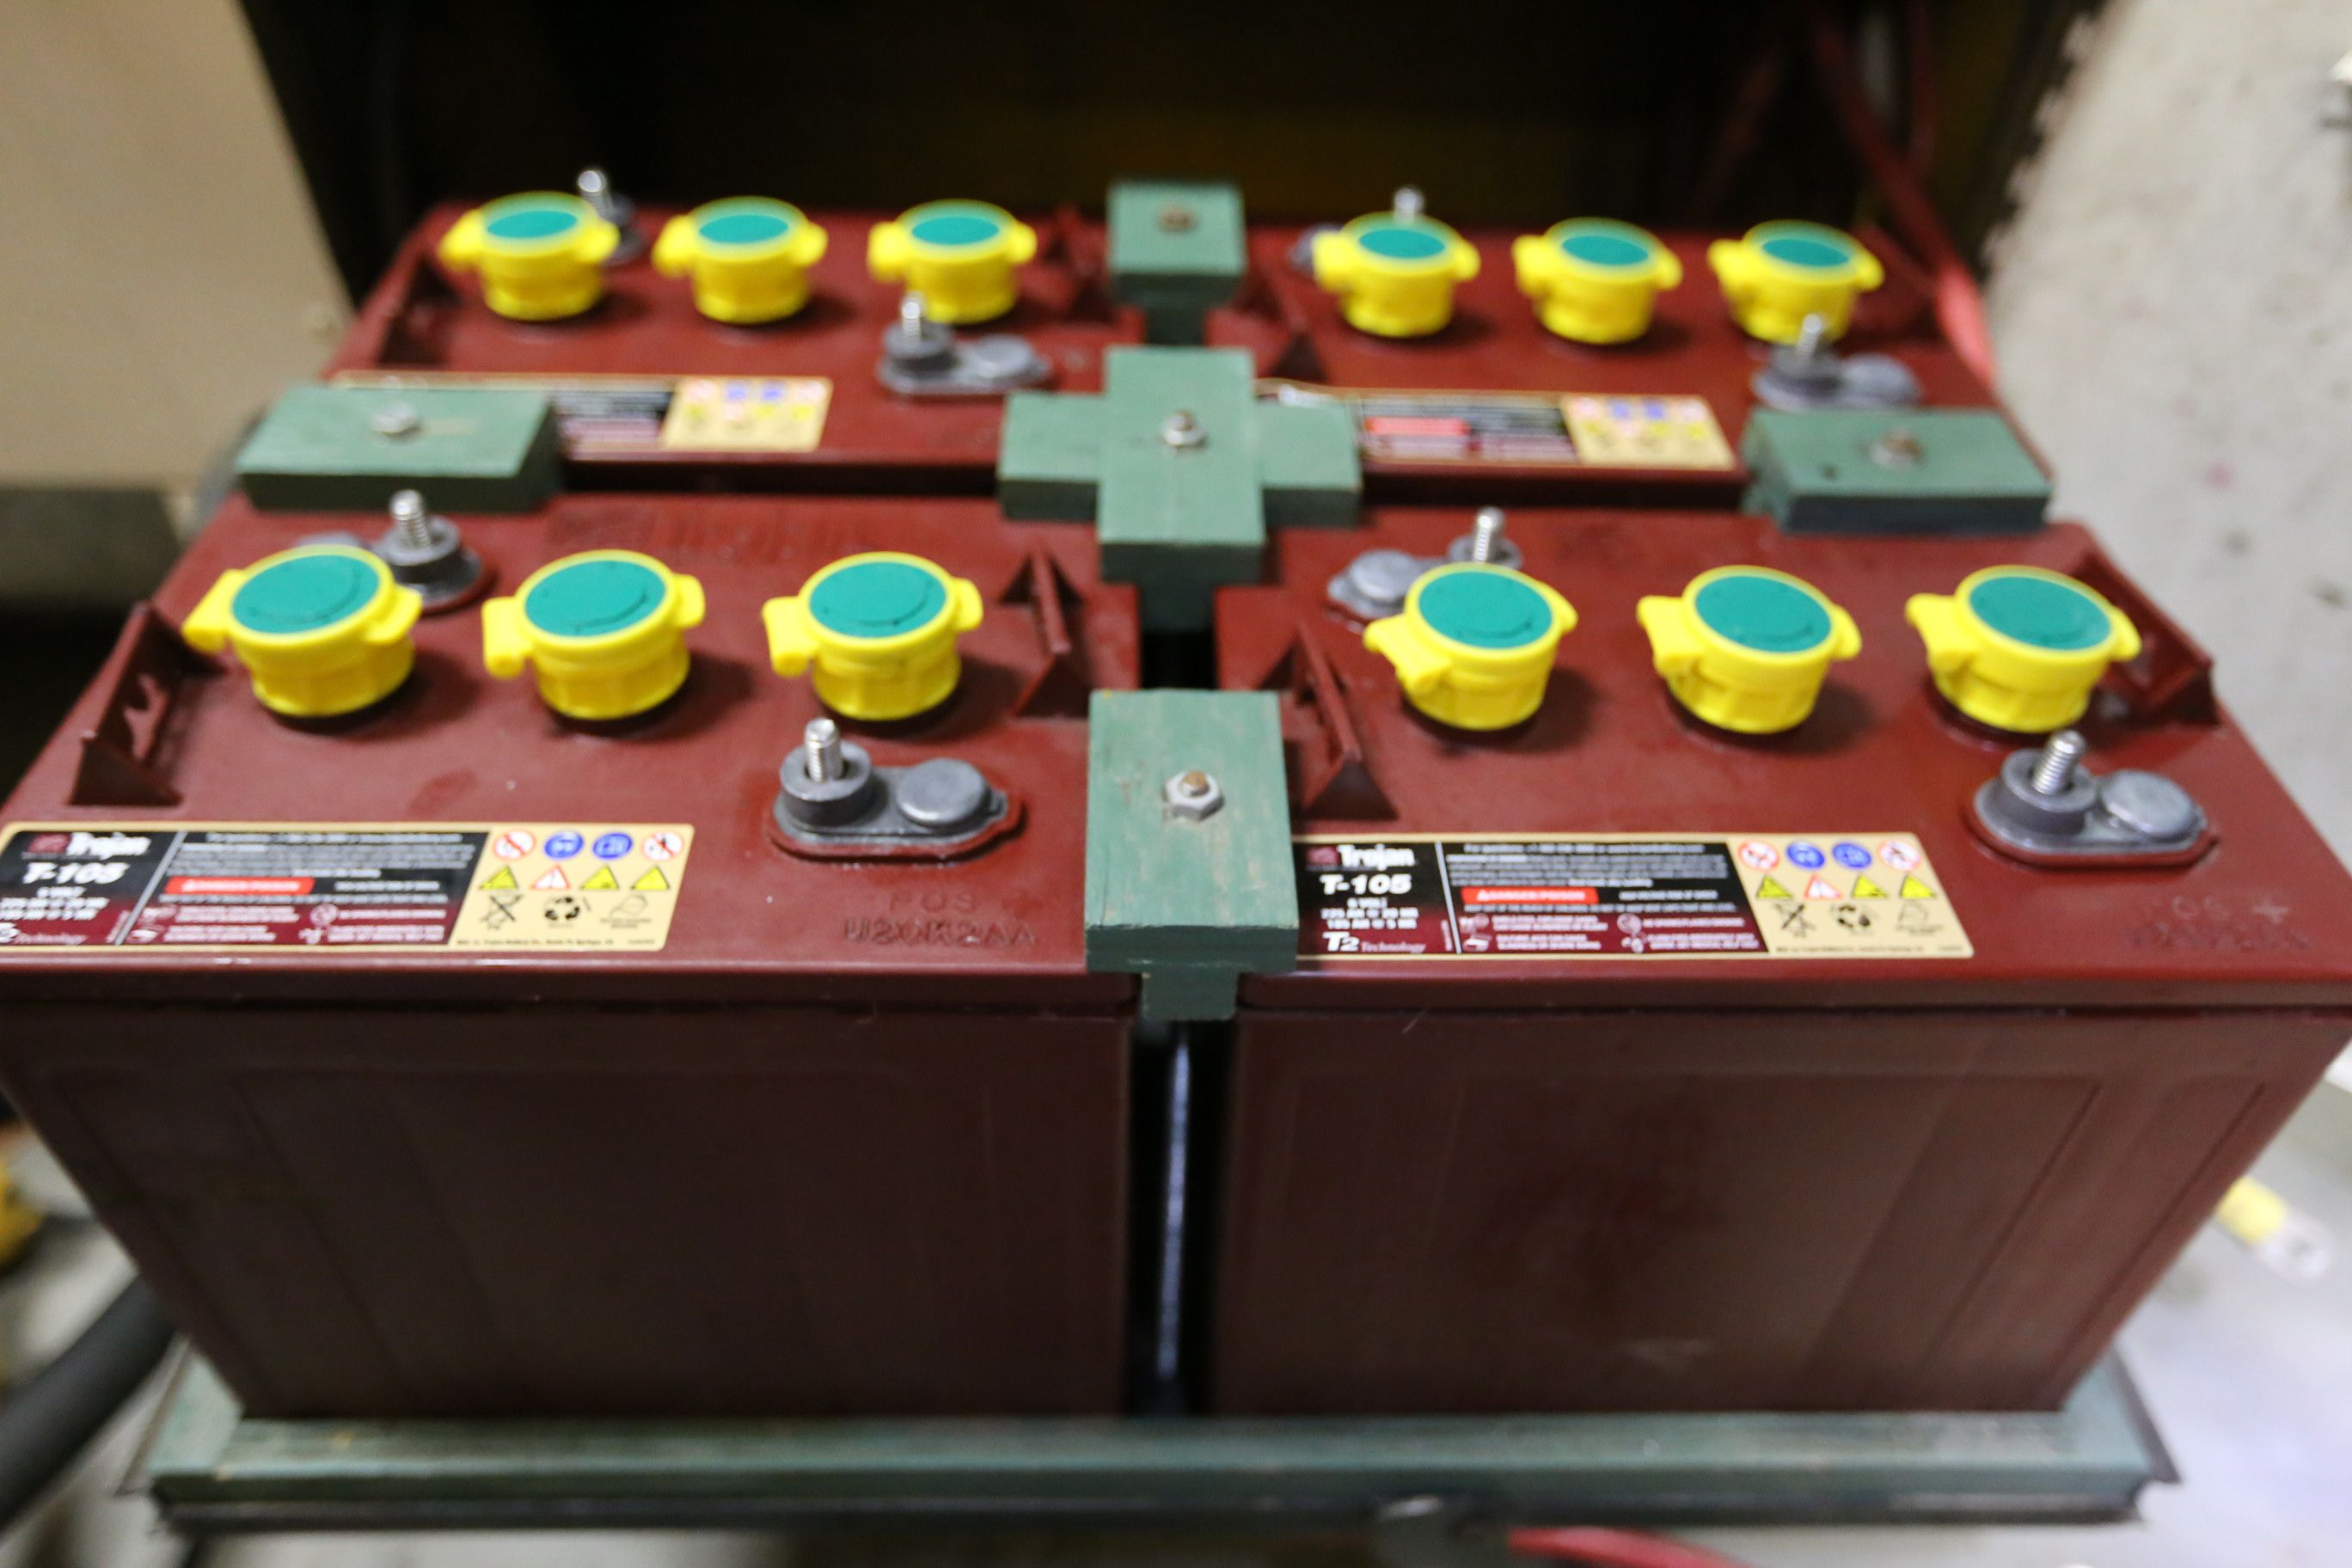
New battery caps on solar/house batteries.
– Solar Battery Bank Caps – I upgraded my solar/house batteries this Spring to some much nicer Trojan T-105s. I had taken the battery caps off my old batteries and put them on my new ones because they opened and removed all three caps on a battery at one time. However, they leaked quite a bit. After doing some research, I found that often these caps that do three at once often leak. So, I sprung for some called Water Misers. Apparently, they allow off-gassing, but capture some of the water back and keep it in the battery. They’re perty and seem to work well so far (no leaks!).

Oil Cooler rebuilt.
– Oil Cooler Rebuild – I had been dreading this project, mostly because I knew nothing about it. In the end, however, it wasn’t too hard – just messy. I had oil leaking out onto my oil filter, and dripping down in a few other places and determined it was the oil cooler o-rings. Fortunately, with this motor (International 7.3 IDI) on the E-Series Ford Vans (as opposed to the Ford Trucks) you don’t have to jack up the engine to remove the oil-cooler. Also, conveniently, the International bigger trucks use the same oil cooler setup as the vans. I mis-ordered the front gasket, but was able to get it from the International parts dealer here in Portland. I had to drain the oil and coolant (make sure you drain the coolant that’s in the block too!), take out the lower radiator hose, remove the battery ground, and unbolt the cooler. After taking it off, it came apart with a few whacks with a rubber mallet. The outer o-rings were falling apart, but the inner o-rings were okay. It had probably never been apart in 24 years. I replaced the o-rings, and then used a floor jack (with the cooler between it and the frame of the bus) to push the two ends back on the tube – difficult, but fun. I got it all back together, filled her back up with fluids, and voilá, no more leaks.
I learned through a bunch of this mechanical stuff that I have a latex allergy. Both times that I used latex gloves for several hours, my hands got little swollen red itchy painful bumps. I guess I have to use nitrile.
Owen’s Shop
I feel super blessed to have been living at Owen and Whitney’s place, to use their shop, and to have a place to call home, even if so briefly. A big ol’ thanks to them.
I was also fortunate to have met a fellow named Ray, who is also a WVO (waste vegetable oil) user. I was selling some aluminum fuel line on Craig’s List listed for use with WVO and he responded. He was super adamant about WVO needing to be free, and since he doesn’t have a WVO car at the moment, and he still collects from some restaurants, he hooked me up with 90 gallons for free! That will get me most of the way to LA. Thanks, Ray!
Edna and I left Portland on the 23rd, headed south for warmer weather and Christmas with friends. As of now, we’re in Nevada City, CA finishing our curtains, possibly replacing our injection pump, and working a few other projects before heading to southern California come January. Our main destination is Los Angeles, but we’re looking into some other places as well (Slab City? Oceanside? Quartzite????).
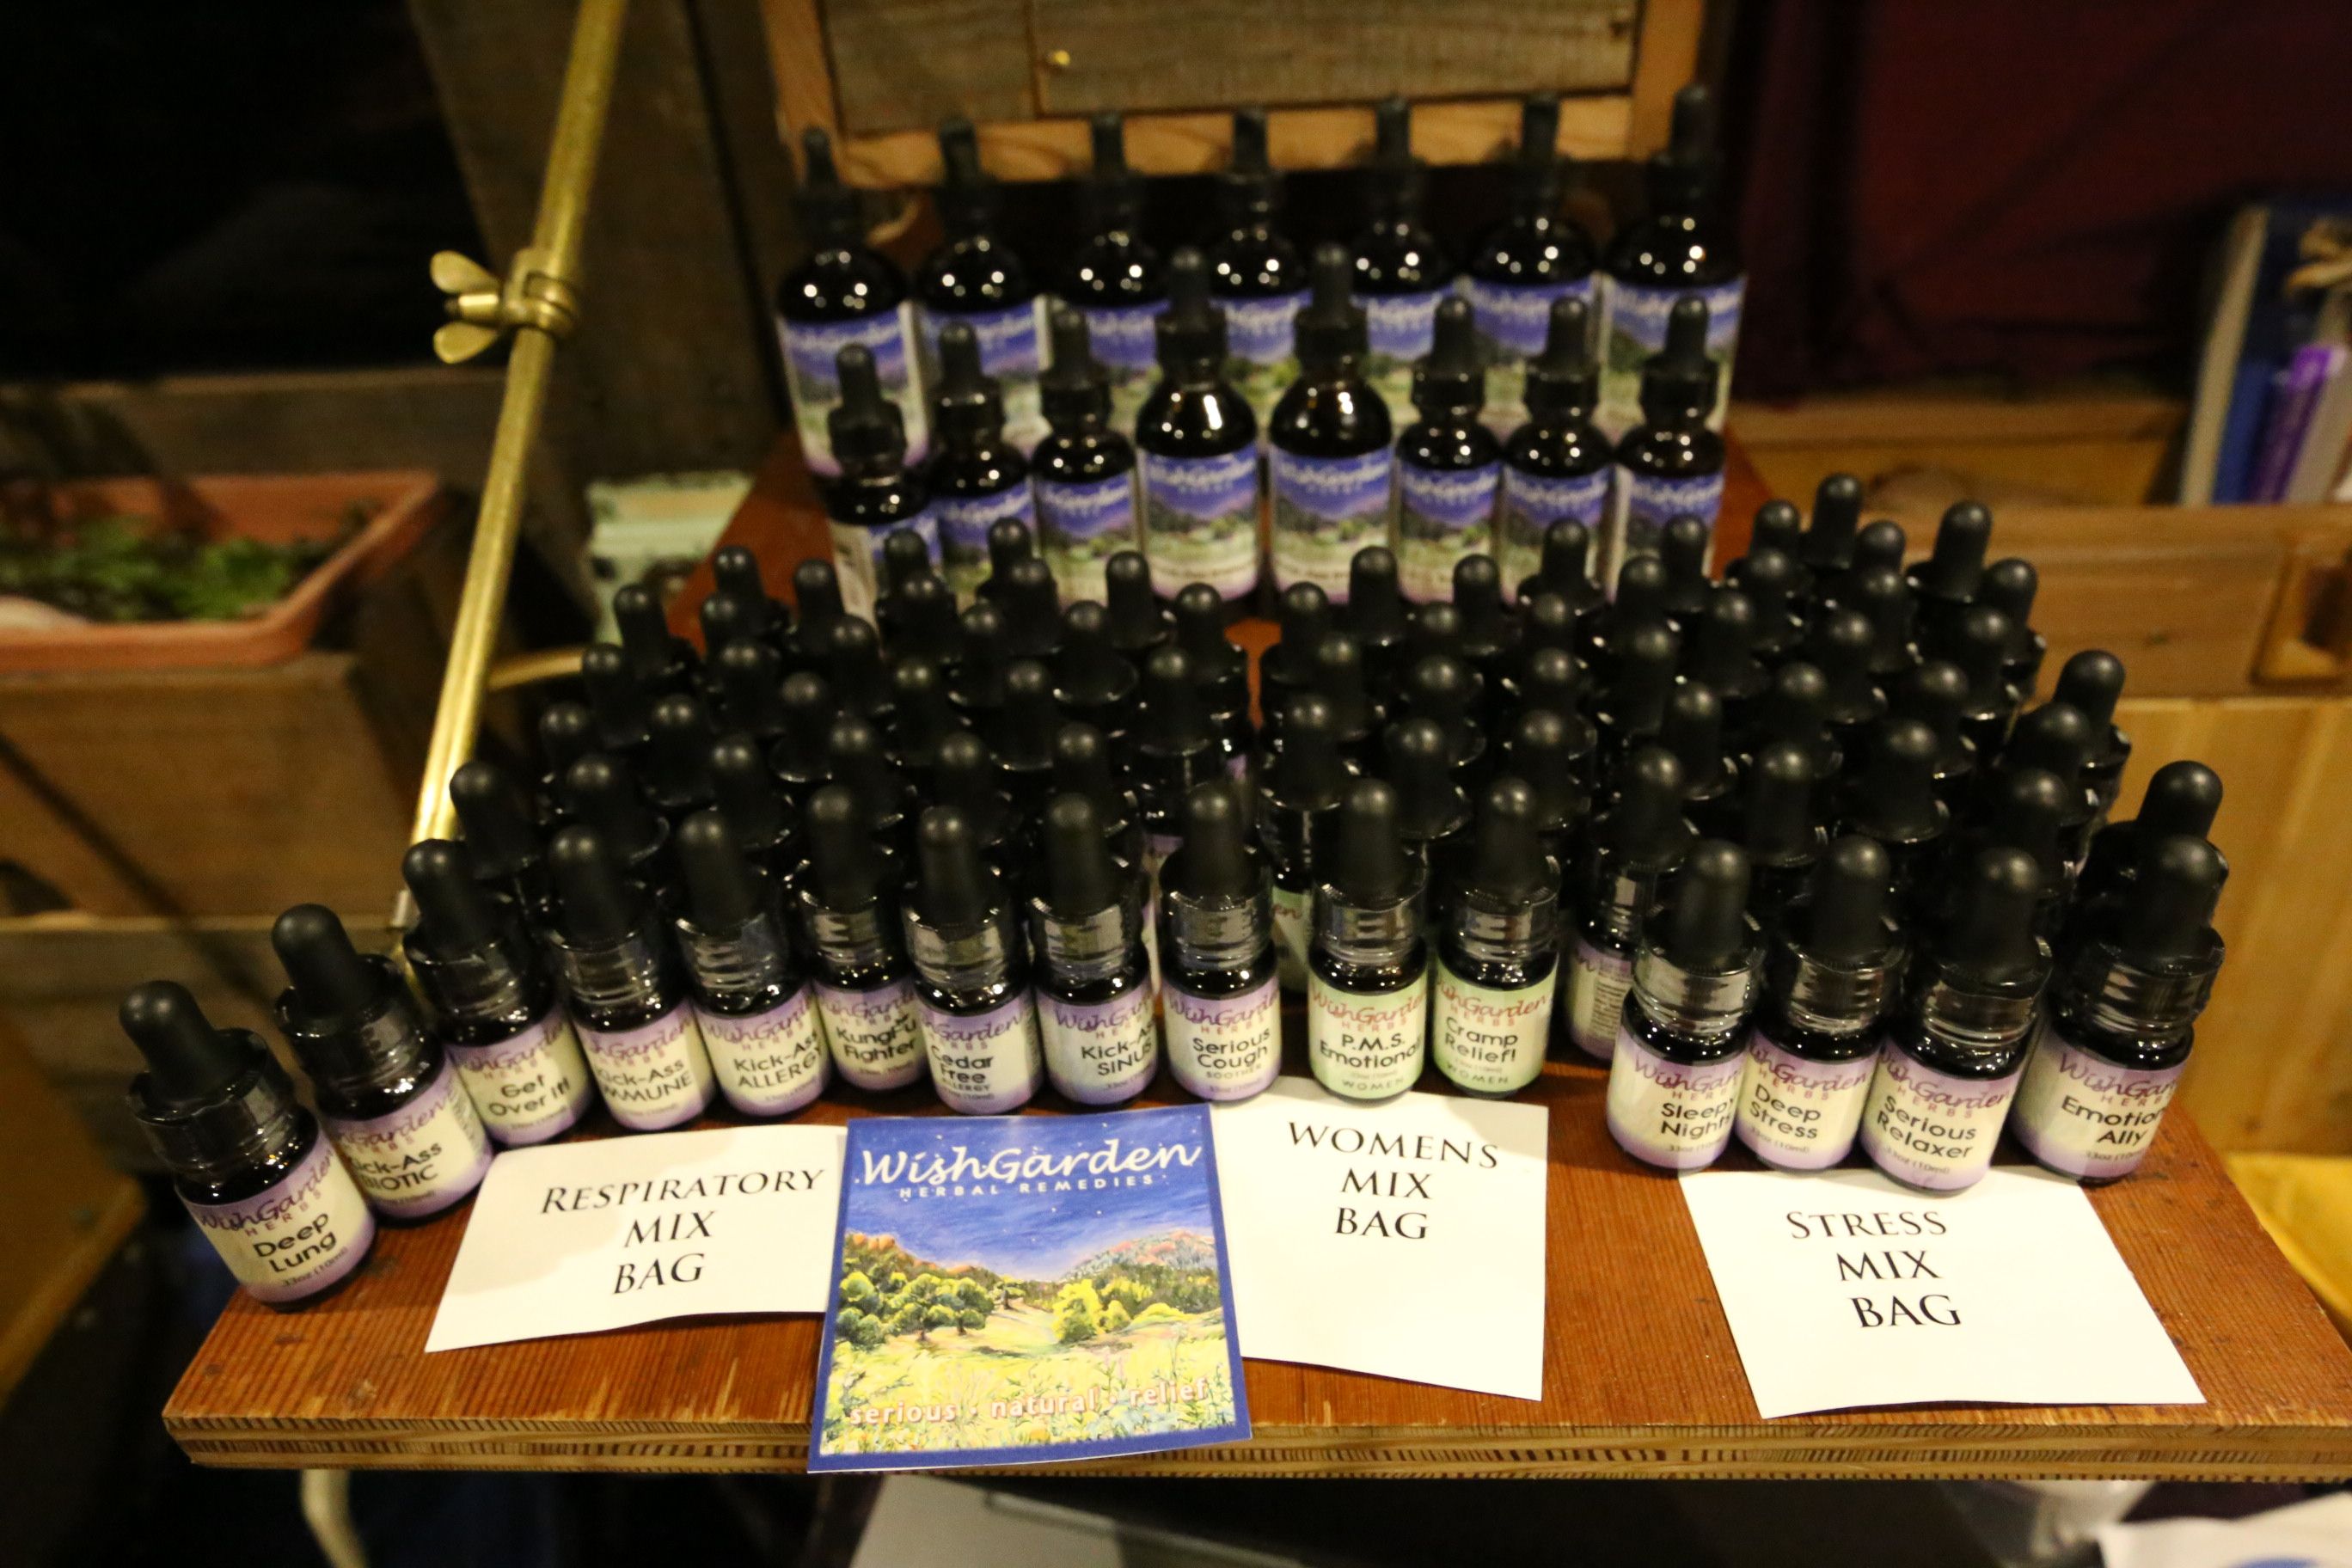
Donation from Wish Garden Herbs.
Recently we received an amazing donation to share with our tea guests from Wish Garden Herbs of a boxful of tinctures, from immune-boosters to sleep-helpers to emotional-soothers. Runa Tea also sent us a huge box of various blends of their Guayusa (relative of Maté). We also stopped at Mountain Rose Herbs on our way south to pick up a big box of various teas. I would like to thank both of these companies for being so so so generous with us. Thank you!!!
WE NEED: A shop/work space in southern CA. Do you have one? Or know anyone who has one? We can work-trade 🙂 …

Awesome donation from Runa Tea.