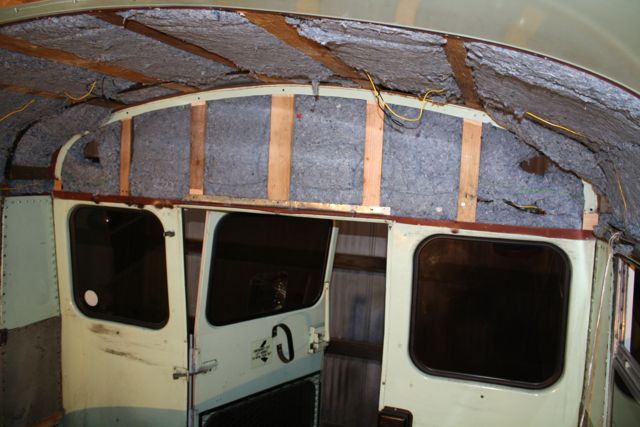
As I took out the old metal ceiling I realized that my roof was leaking – and pretty bad at that. When I painted the bus November I resealed the entire roof, but upon inspection I found that two of the piece of sheet metal that make up the roof had come apart, probably due to walking on the roof. At this point I decided to reseal most of the at risk parts of the roof. Doing some research, I decided to use 3M’s 4000 – a heavy duty UV resistant marine application sealant. It went pretty smoothly, but rain will be the true test.
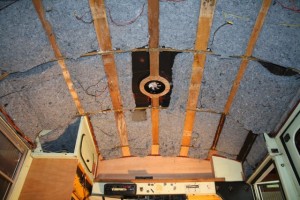
Letting the recycled cotton insulation air out, I started building some framework in the front and back of the bus where the bookshelves and suspended bed are going, respectively. Using space efficiently is crucial when building any small house, so cutting into previously unused space (in the upper back part of the bus), and into a underused space (in the upper front part of the bus) was a must.
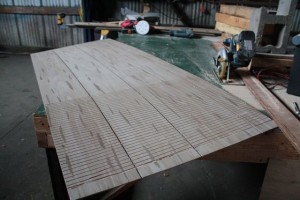
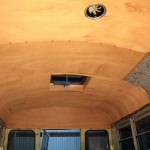
Once it was dry, I cut up my first piece of reclaimed wood. I had taken it out of my brother’s house during a remodel almost a year and a half ago and driven 1600 miles with it strapped to my roof rack (unfortunately losing the whole load on the 101 at one point – no one was hurt and good lessons were learned). The side of the paneling that was supposed to be exposed was a really ugly faux wood finish. The other side however is a beautiful thin plywood, ready to be sanded and finished.
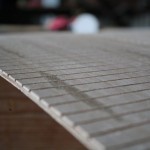
Originally, my plan was to steam bend the pieces for the tight radius curved pieces. I build a steam bender powered by my large teapot, but the wood didn’t seem to take the moisture and wouldn’t bend enough to make the radius. After some deliberation and talking with other builders (it’s nice to have so many around the shop and island), I made the decision to score the back of the wood every 1/2″ with a depth of less than a 1/16″ for the tight radius. It worked like a charm, although now that it has been finished, you can see all the gradual flat strips that make up the wood between the scores.
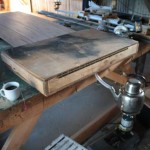
I gave it a stain made of extremely steeped black tea with roses (Gypsy Love), although it didn’t darken it too much. The process is simple: Boil four times as much water as you want of stain. Add more tea bags than the box recommends, and let it boil until it is 1/4 the amount of liquid. It should look just like regular wood stain. Because tannins are one of the things that give dark wood their rich color, this process of over-steeping and releasing lots of tannins from the tea brings out those colors in the wood you are staining. The final finish was a satin water resin from Bioshield. It was by far the best coating of all the test pieces I did (compared to OSMO Polyx-oil and Hemp oil cut with a pure citrus thinner). The water resin actually made a separate protective layer over the wood, whereas the other two just oiled the wood (you could still feel all the grains, etc.). I have a hard time imagining that the Polyx-oil would be very good for floors, like some people use it for.
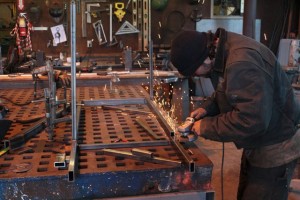
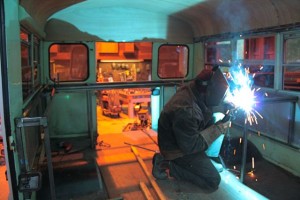
As the ceiling was coming together I started working with a local metalworker named Jorgan to get a metal frame built as part of the benches, kitchen, and platform for the suspended bed to come down and rest on. It was an ideal situation. He taught me a few basics about using some of the tools in his shop I had never used, and I got to work cutting and clamping metal together. Once I had enough together, he would take a break from what he was working on to burn some welds, and the process would repeat. In this way we built the majority of the frame in the better part of a day and I came back later to finish the rest. It wasn’t that I wasn’t comfortable welding it myself, but I only have a 110v welder and I figured that a professional like him with the right equipment should build the foundation to my whole interior setup.
He’s an interesting character, and one that I do enjoy very much. His vagabond lifestyle, traveling with the Dead and on a motorcycle, as well as his anarchistic tendencies, vibrate well with me. He came to Orcas Island with nothing but his motorcycle (10 years ago?) and now is the maintenance man at a sawmill. Using their huge shop space, as well as an addition he built on for blacksmithing, he has created an amazing zone for working all things metal, and lives out back in a simple cabin. We shared stories from the road and compared my pop can stove to his zip stove and sipped tea with the resulting hot water.
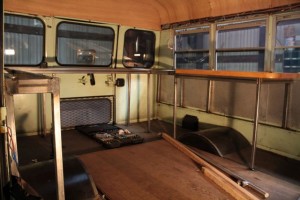
With the metal framework mostly done, I brought it all home to make some final touches with my welder, grinder, and some paint. I was trying to use all low or no VOC paints, but I couldnt get a metal primer in time, so I used an ACE brand primer. It turned out well, but when I went to do a coat with some Bioshield environmentally friendly paint, it didn’t stick to the primer real well. That, along with some bad color choices made each of the three frames (built to be taken out if necessary) different colors (primer red, white, and what has been called baby poo brown). If I could do it over, I would have only painted them with the primer…
The framework built is to be the foundation for benches, a kitchen counter, storage, and it builds a level surface for the bed to lower down from the ceiling and rest upon. And I’ll tell you, it is STURDY. Bolted, welded, and screwed.
I finished the ceiling shortly after the framework, although I still have to trim it out. Things are coming along… Bit by bit. I am realizing that this kind of process takes a lot of time. Time to get the right materials (because I am trying only to use salvage and green). Time to do test staining. Time to wait for people to help. Time to build it all. When you want quality, quantity (or speed) suffers. But it’s okay…



One Response to Bus Building – Ceiling and Interior Metal Frame